
TheFameNest Admin Walkthrough: Add a New Platform, Service & Live Page
July 1, 2026

Marcus Reed
Head of Storefront Operations
Updated for the new Admin layout — catalog setup (platform → service → packages), two supplier linking paths, CMS/SEO/FAQ, site partials, and matching frontend screenshots on thefamenest.com.

You picked a niche panel SKU that does not exist in your catalog yet — new platform, new service type, zero packages, no landing page. The storefront cannot sell air. This walkthrough walks a full new-service launch on a live tenant: thefamenest.com.
Screenshots use the current Admin layout (2026). Your domain replaces thefamenest.com; routes stay /admin/….
New to the platform? Read why resellers skip custom builds first, then mirror this checklist on your tenant.
Log in and find your way
Open https://yourstore.com/admin. Tenant owners land on the merchant dashboard first — click Enter site admin for the domain you are editing.


Part 1 — Build the catalog (new platform end-to-end)
Think hierarchy: Platform → Service type → Service → Package type / category → Package. Skip a layer and checkout breaks.
1.1 Platforms
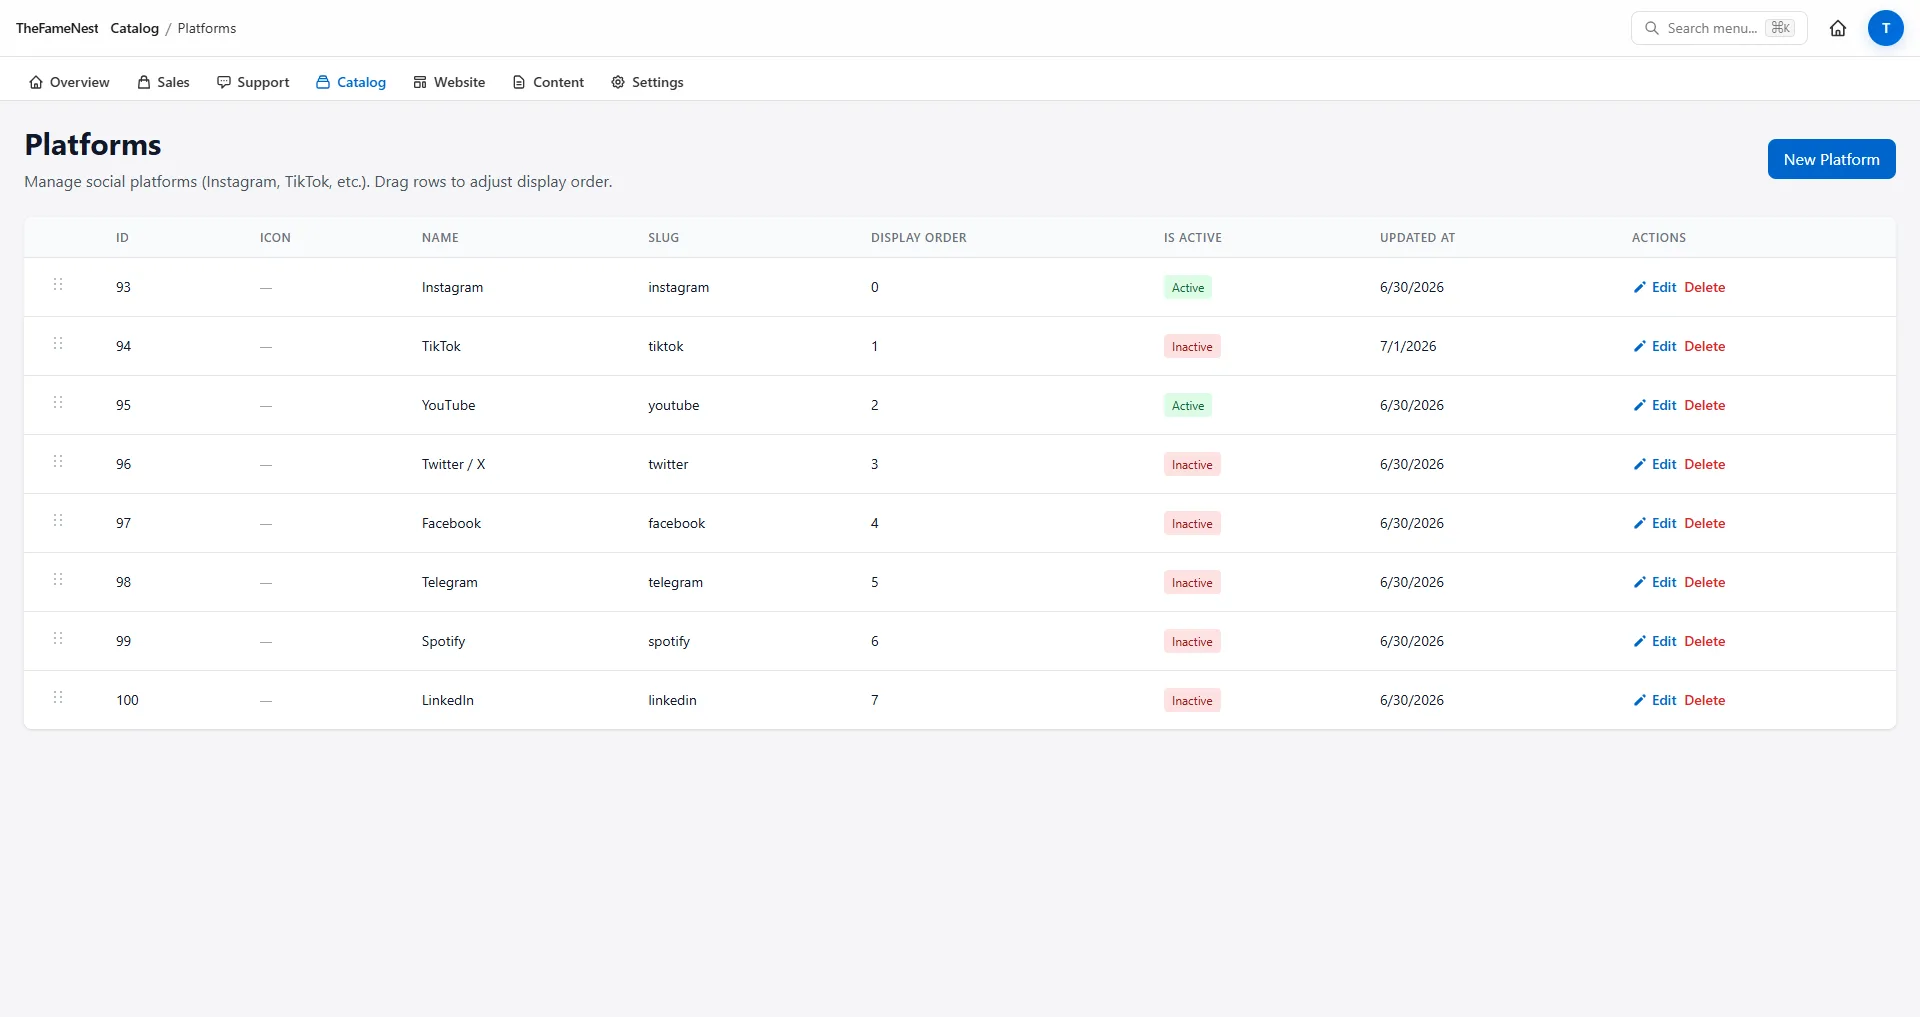
/admin/platforms — add a row when you sell a network that is not in the template yet (e.g. Threads, Bluesky). Set name, slug, icon, display order.
Storefront effect: once saved, the homepage platform grid picks it up automatically — no manual homepage edit.
1.2 Service types
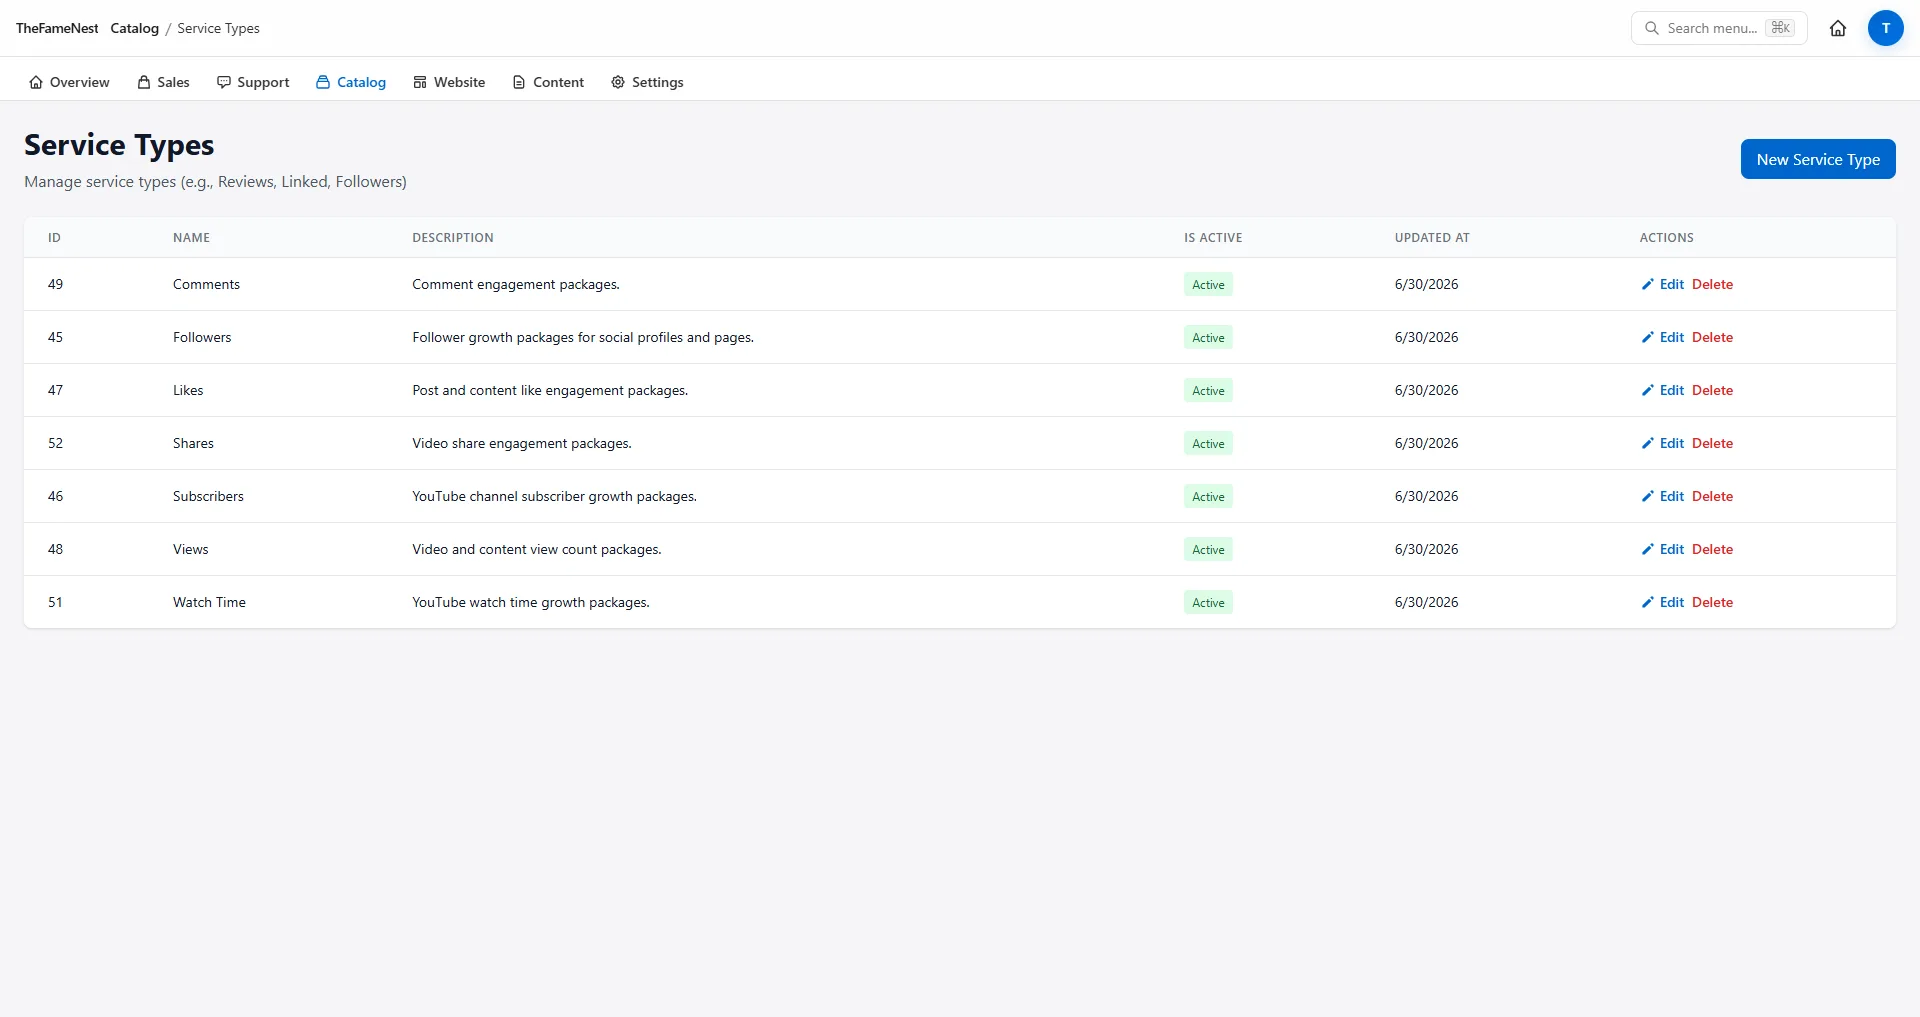
/admin/service-types — global families: Followers, Likes, Views, Comments. One type can attach to many platforms.
1.3 Services
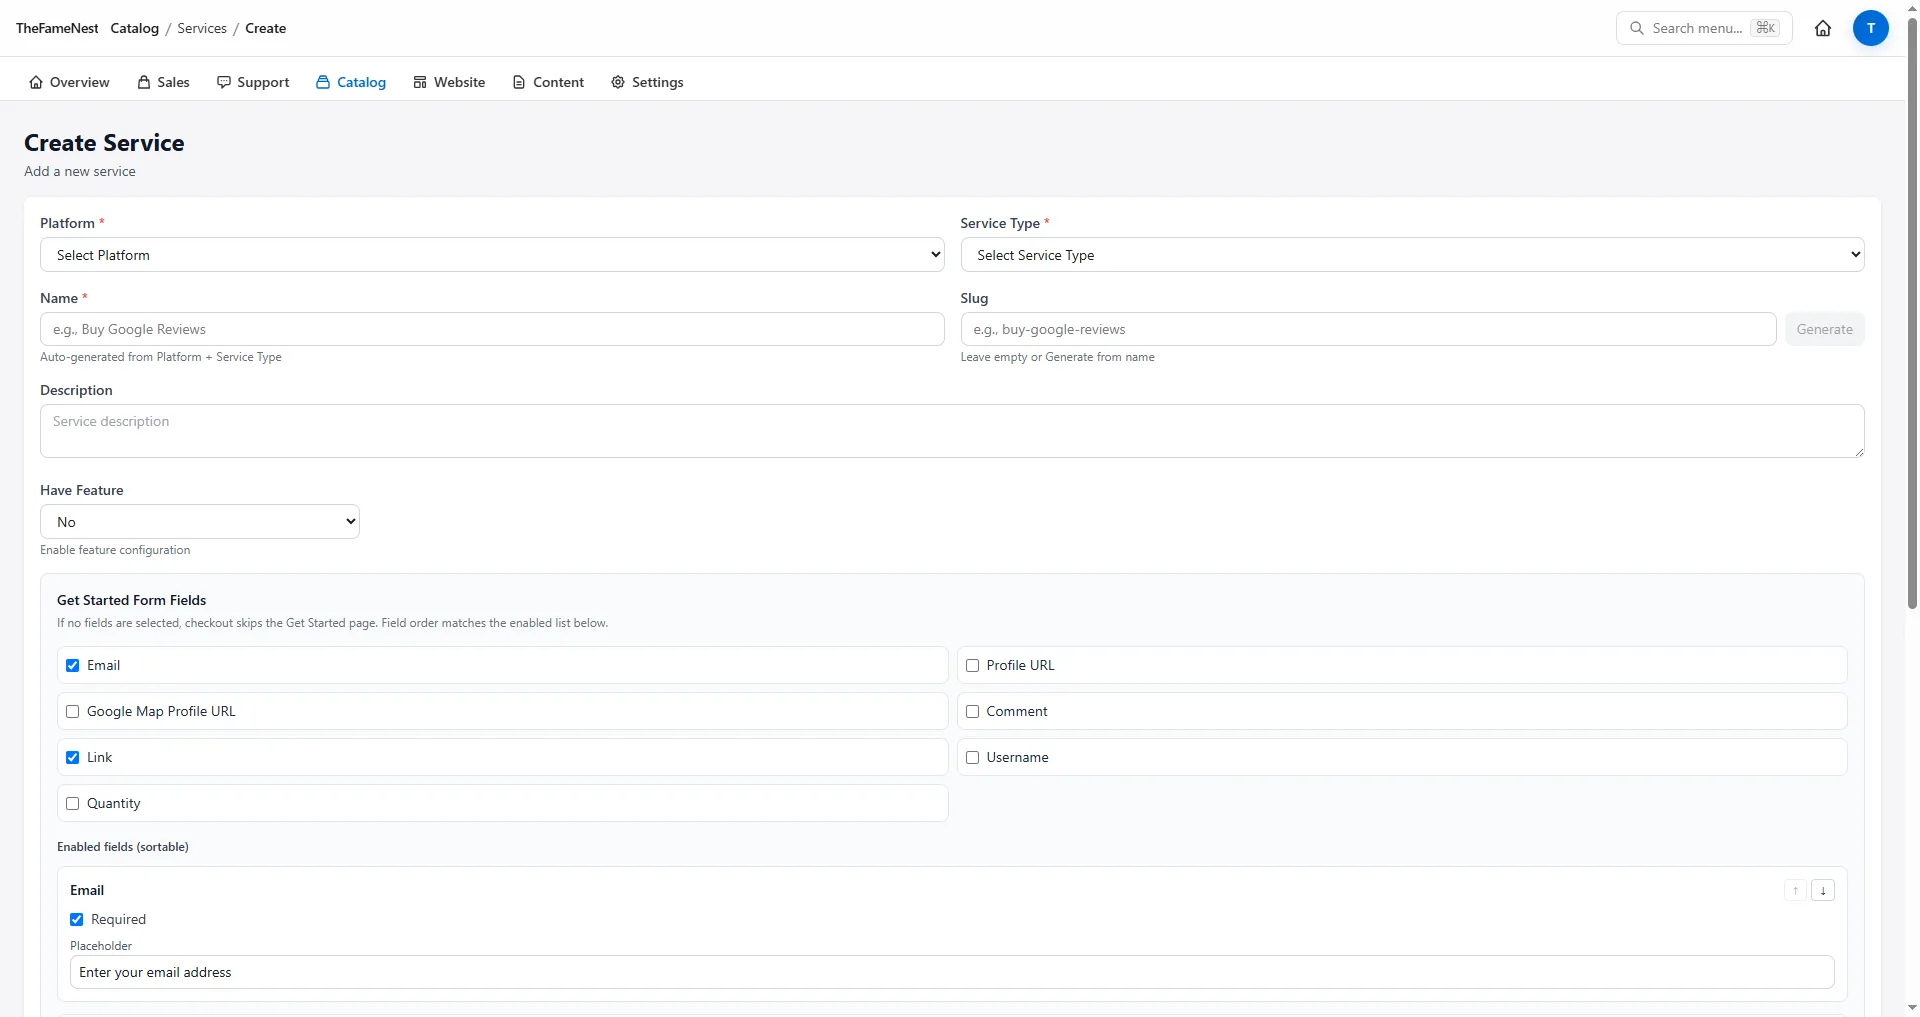
/admin/services — the sellable SKU: platform + type + your slug and copy. /admin/services/create walks the form.

1.4 Package types and categories
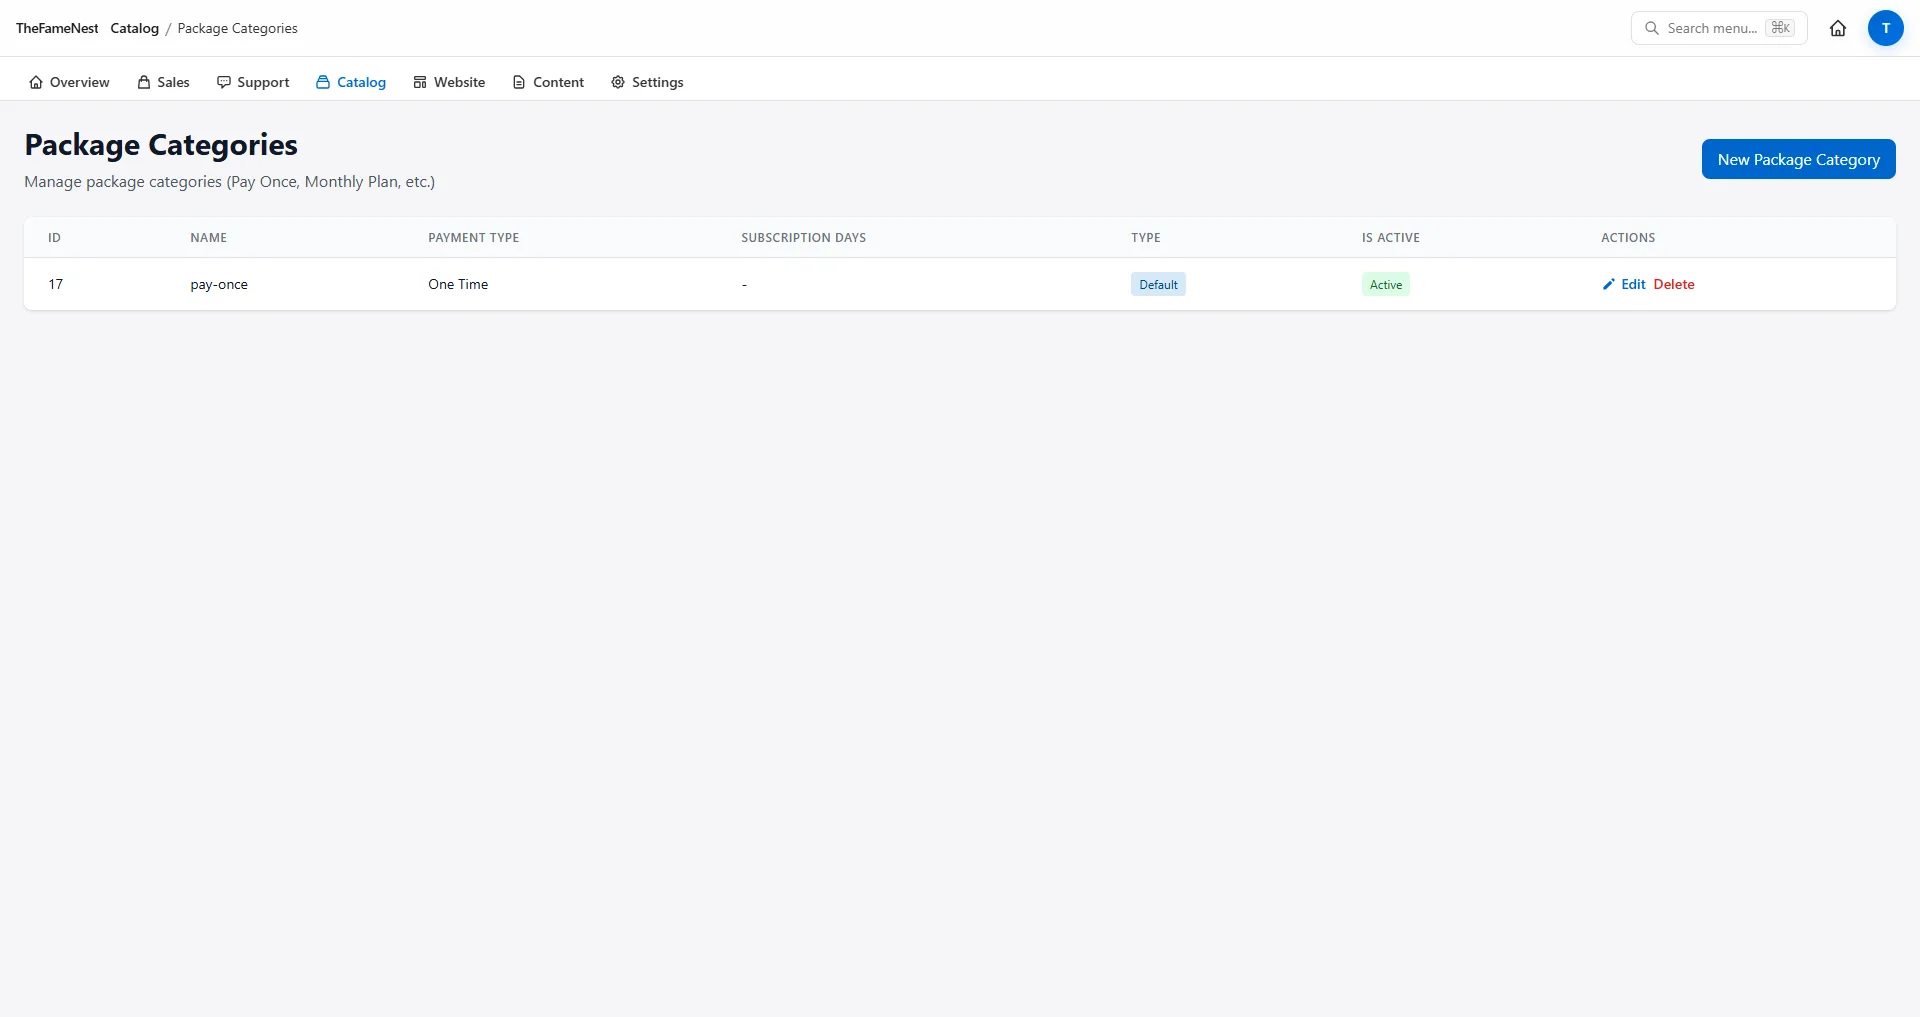
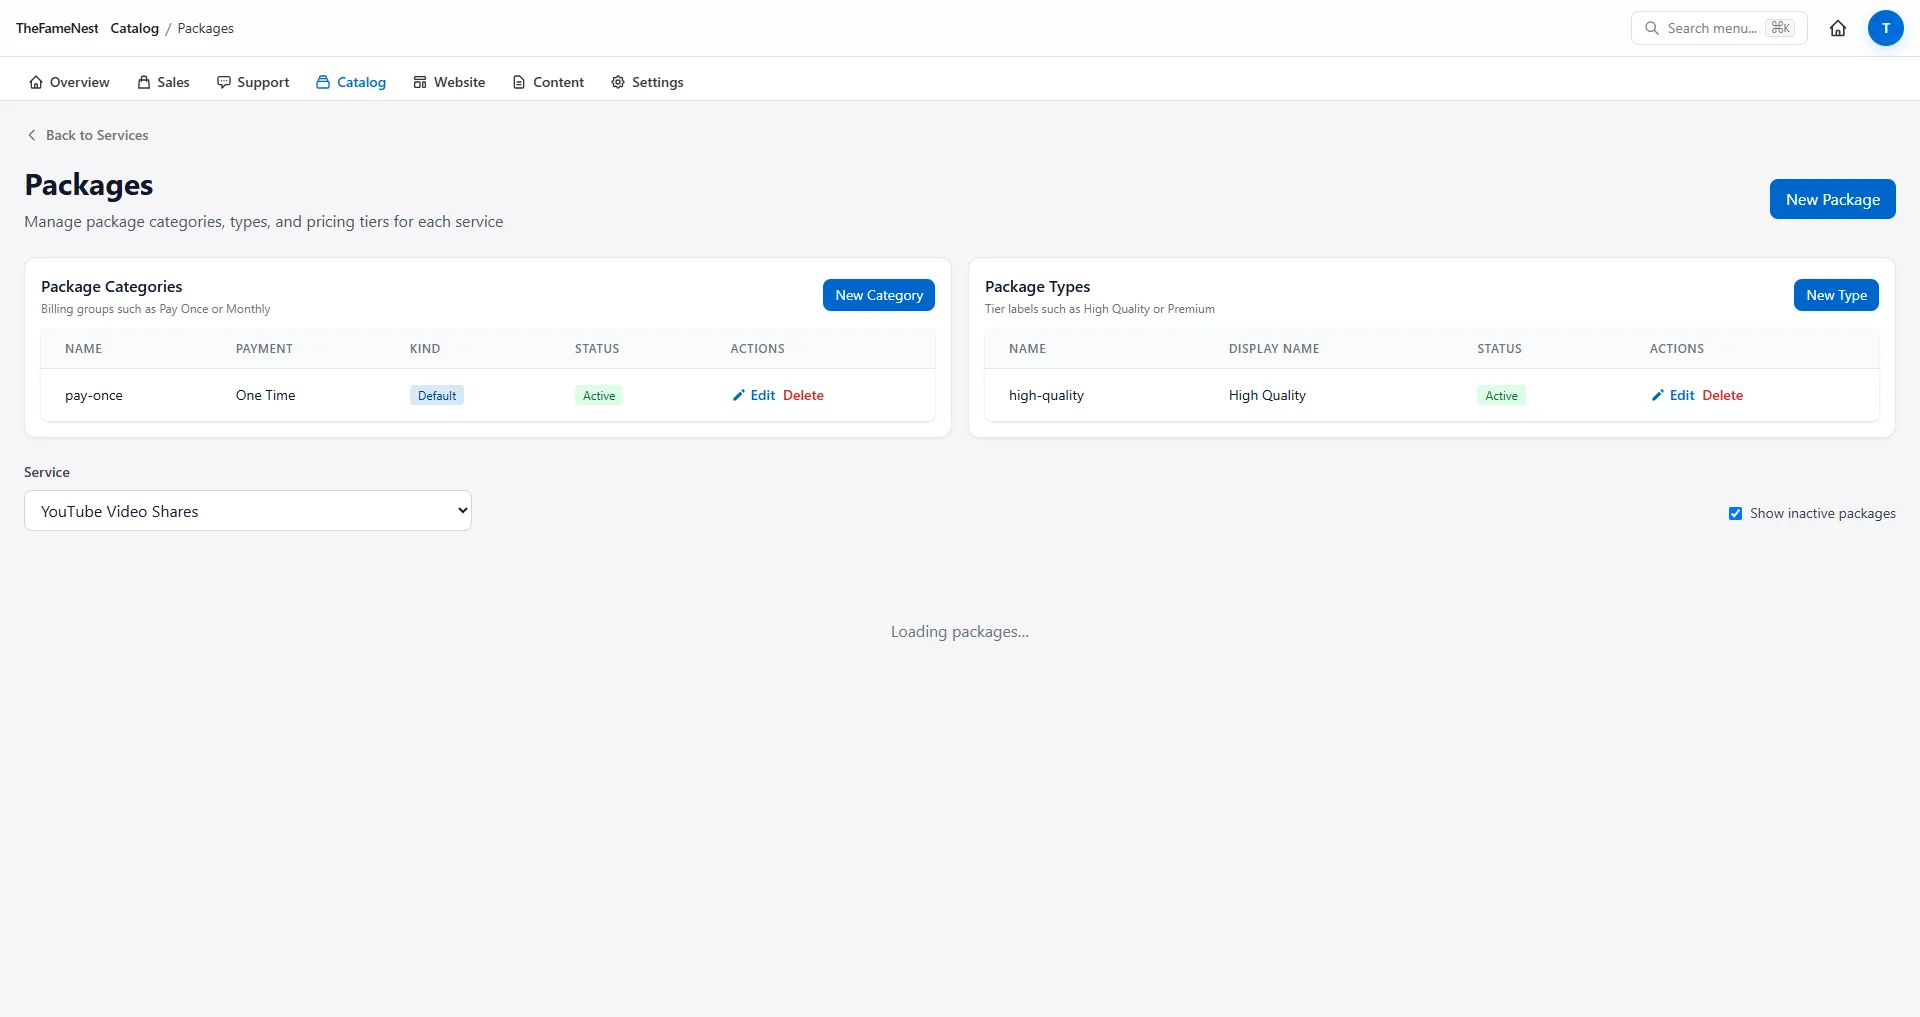
Before pricing, define dimensions buyers recognize:
/admin/package-types— High Quality, Active, Premium (template defaults exist; add if you split tiers)./admin/package-categories— Pay Once vs subscription-style groupings.

1.5 Packages
Open /admin/packages?service={id} from the service row. Create one-off rows or use Batch create packages after supplier binding (Part 2).

Part 2 — Connect supplier fulfillment (two paths)
SMM orders must forward to your panel. You can get there two ways — same end state, different starting point.
Path A — Import from supplier, then tune slug and copy
- Add panel credentials under
/admin/supplier-providers. - Open the provider → Import → tick remote services → import creates local services with rates and min/max.
- Edit each imported service: fix slug, SEO fields, and marketing name — import is logistics, not merchandising.


Path B — Create service first, link supplier on edit
- Create the service manually (Part 1.3).
- On
/admin/services/[id]/edit, open Supplier fulfillment → pick provider + remote service. - Save — checkout orders route to the panel after payment.

Digital accounts: use /admin/config → HstockPlus + /admin/services/import by product URL instead of SMM Suppliers.
Part 3 — Service page: content, SEO, FAQ, testimonials
Each service has a CMS page (often auto-created with the template). Open /admin/pages → edit the row whose slug matches the service.
| Tab | What to set | Storefront effect |
|---|---|---|
| Basic | Slug, active flag | URL live or 404 |
| SEO | Title, meta description, keywords, OG fields | Google snippet + social share card |
| Content | bodyHtml with {{packages}}, {{faq}}, {{testimonials}} | Marketing prose + injected catalog blocks |
| FAQs | Question/answer rows | Rendered in FAQ block + long-tail SEO |
| Testimonials | Social proof rows | Trust section on service landing |
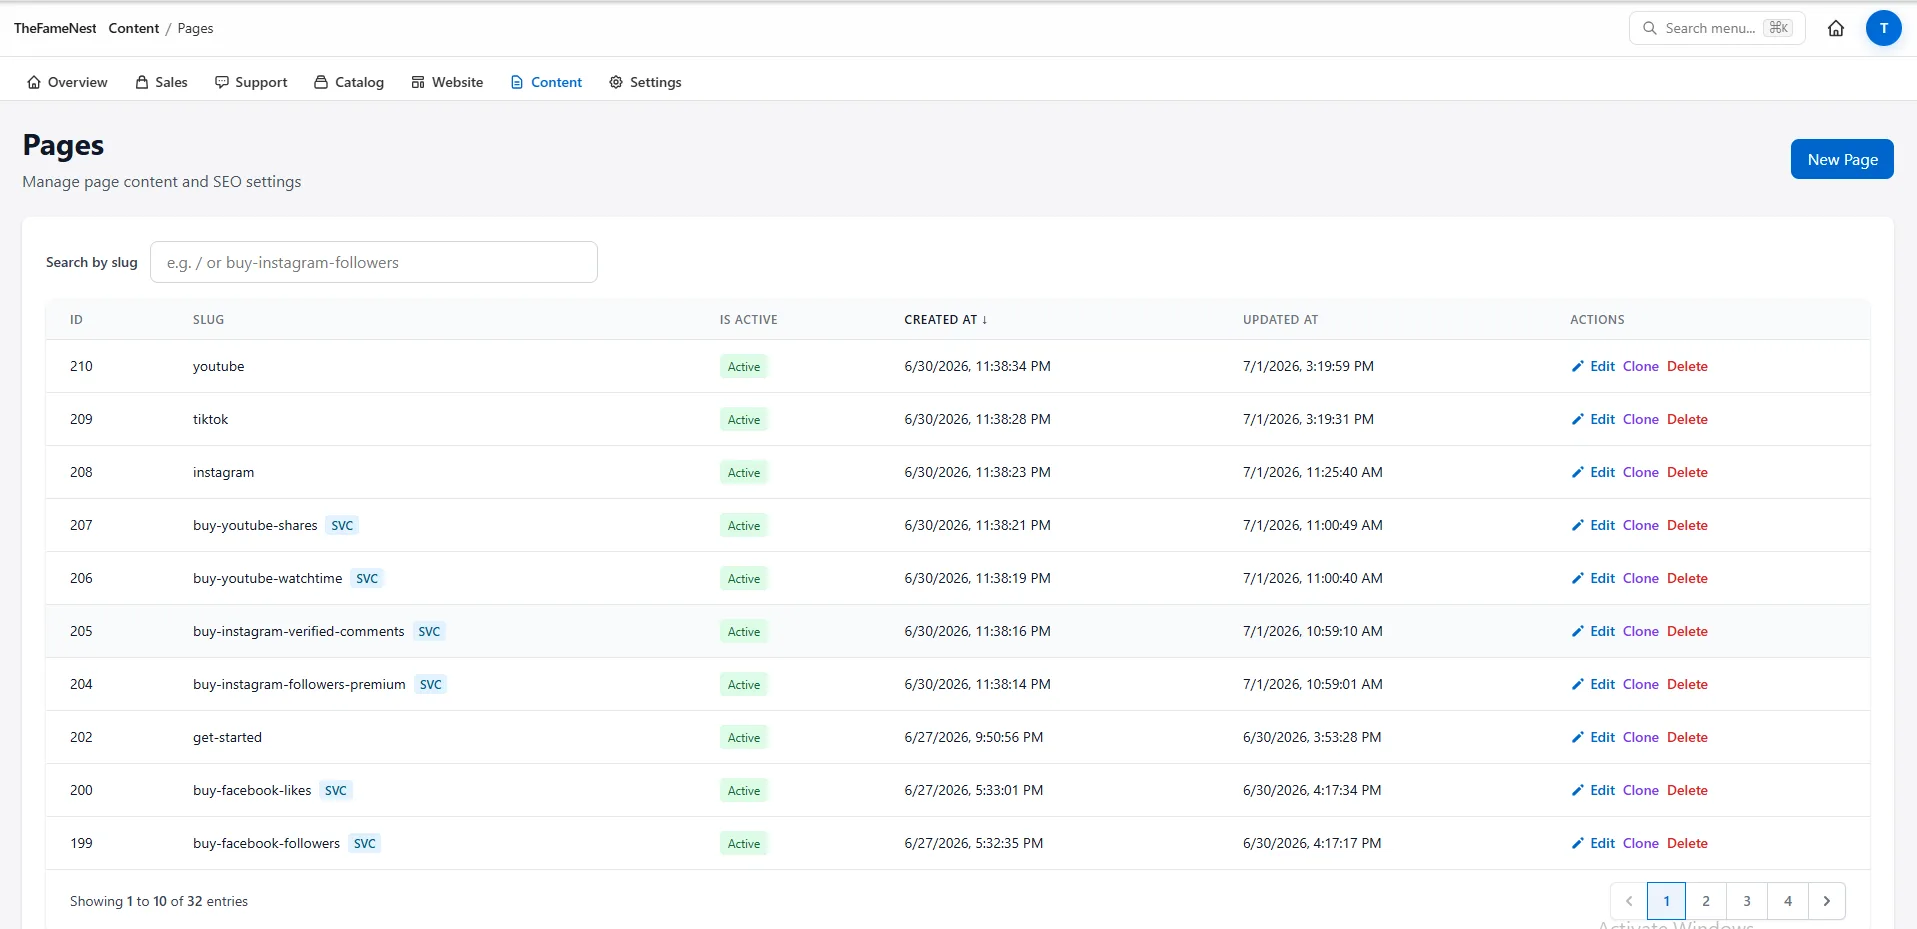
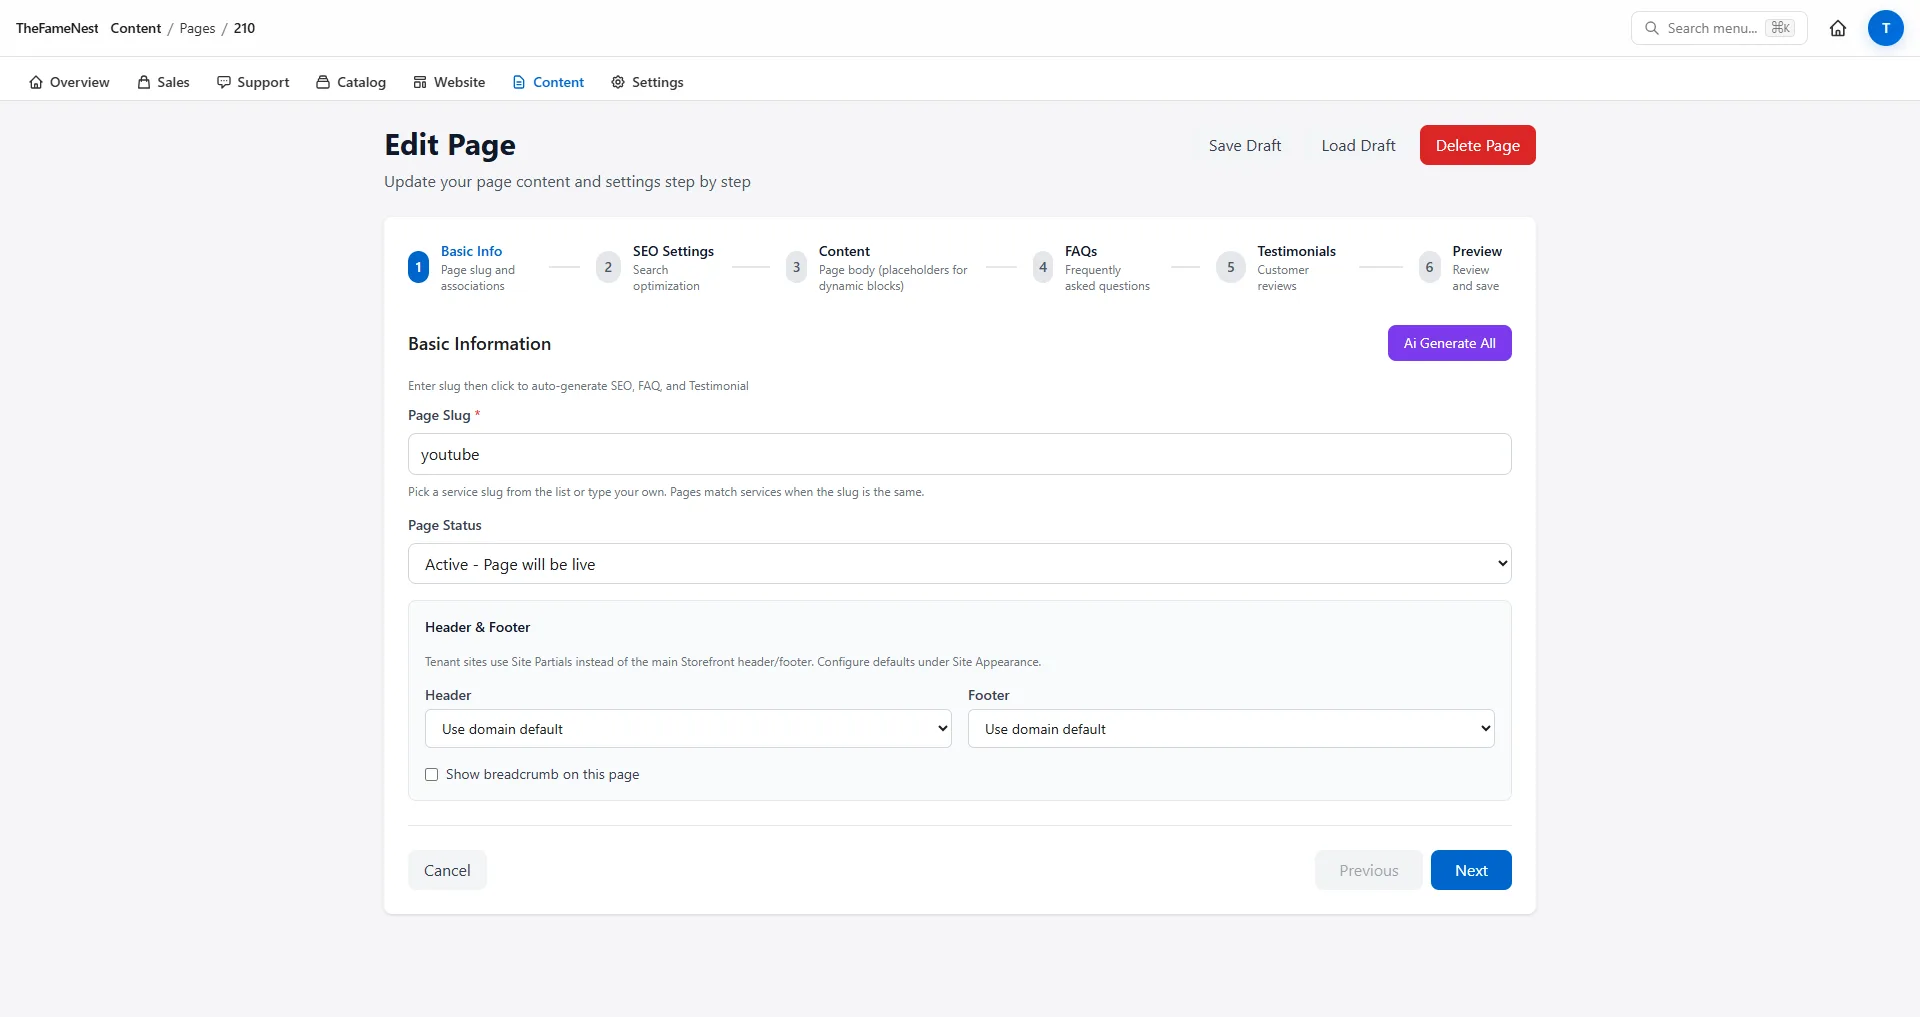
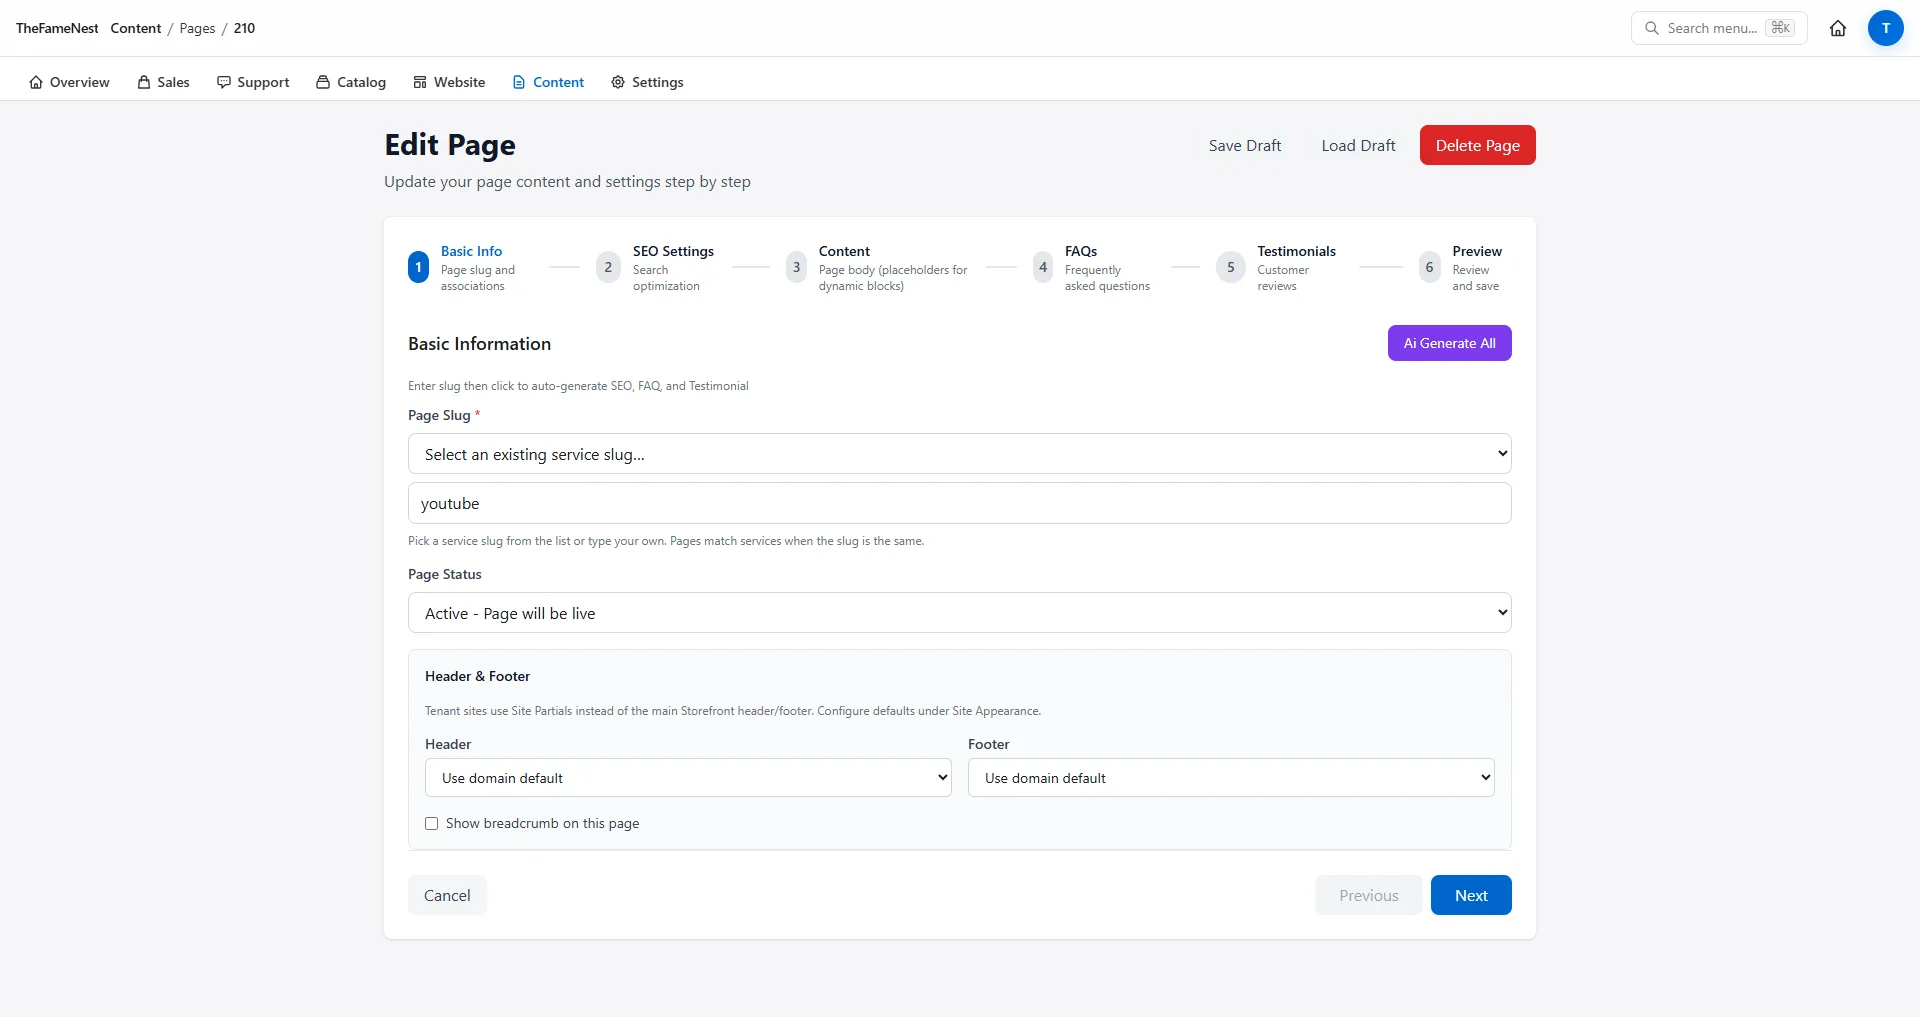

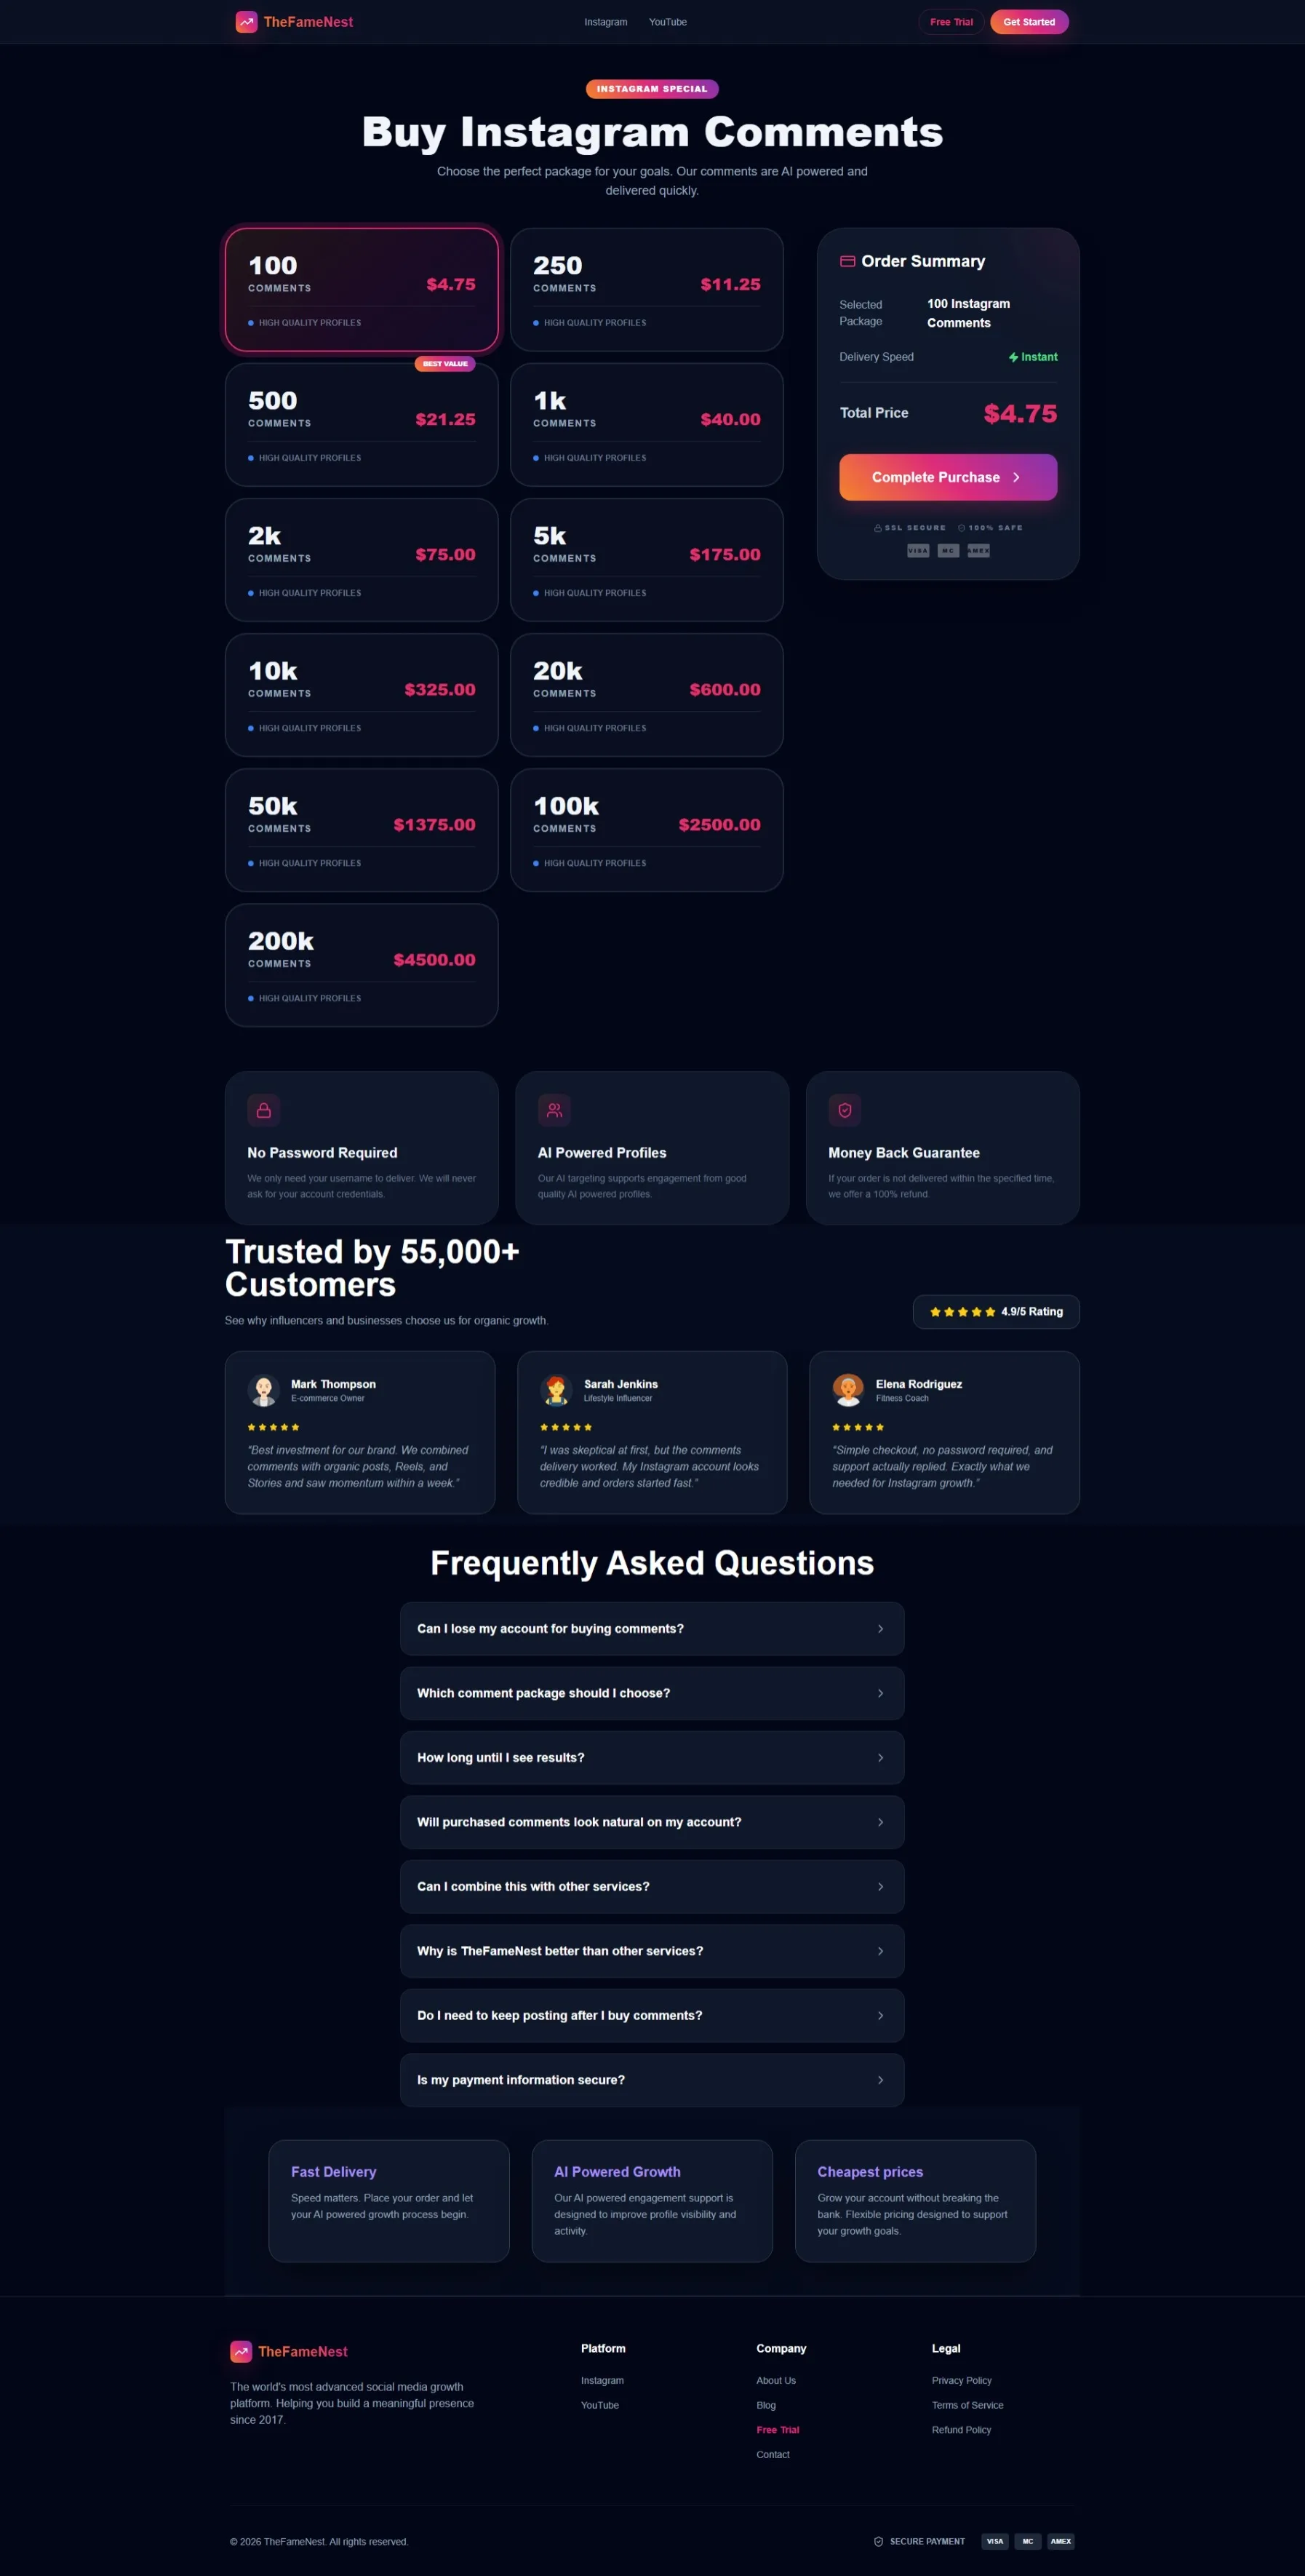
When Basic + SEO + packages exist, open the public URL (e.g. /buy-instagram-followers). Package cards should render from catalog data, not hard-coded HTML.
Part 4 — Header and footer (separate from service pages)
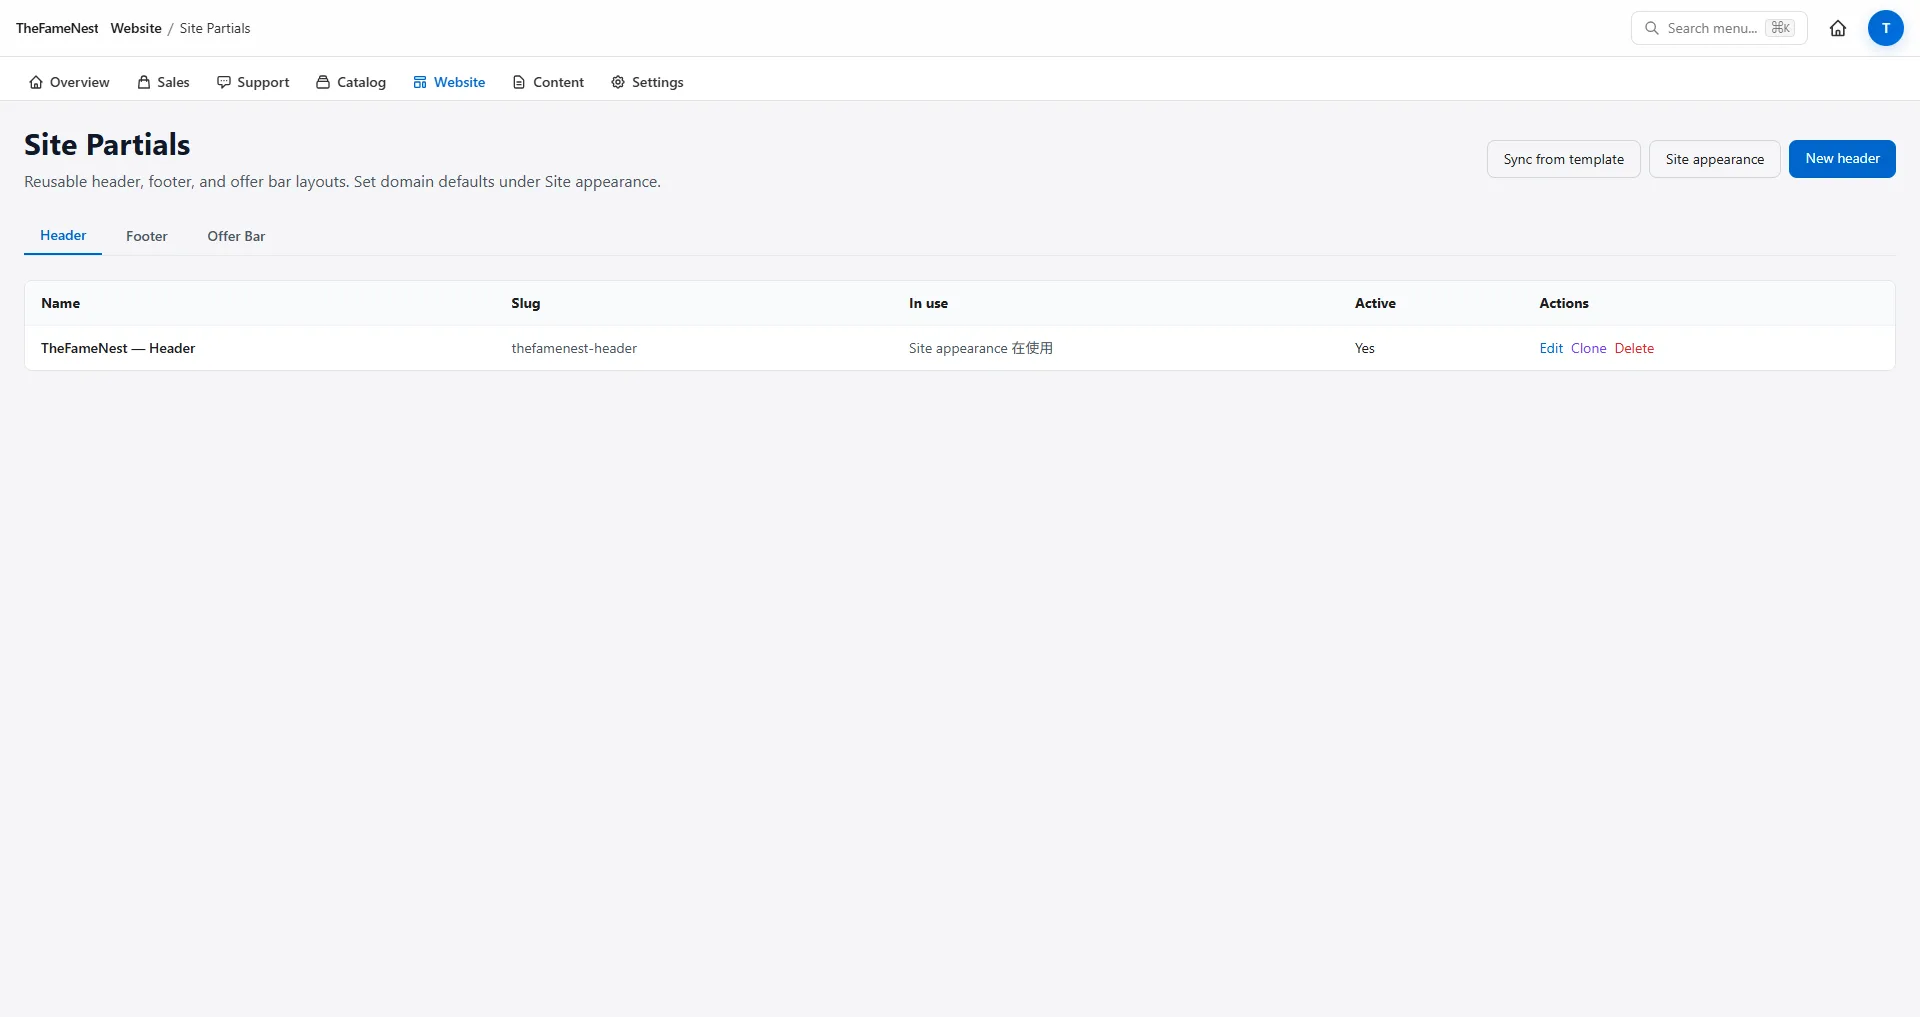
Site chrome is not edited inside the service page wizard. Use /admin/site-partials for header, footer, and offer bar HTML — global across all pages.
/admin/site-appearance still holds logo, favicon, and theme colors. Change chrome here when you rebrand; leave service bodyHtml alone.

Verify on the storefront
After Part 1.1 (platform), check the homepage — new platform tile should appear without a homepage CMS edit.

After packages + page tabs are saved, hit the service URL in a private window. You should see tiers, FAQ, and checkout — then run one test order and watch /admin/orders.

Quick reference — Admin routes
| Task | Route |
|---|---|
| Platforms | /admin/platforms |
| Service types | /admin/service-types |
| Services | /admin/services, /admin/services/create |
| Package types / categories | /admin/package-types, /admin/package-categories |
| Packages | /admin/packages?service=… |
| SMM suppliers | /admin/supplier-providers |
| Service page CMS | /admin/pages/[id]/edit |
| Header / footer | /admin/site-partials |
| Brand / logo | /admin/site-appearance |
| Orders & revenue | /admin/orders, /admin/dashboard |
Footnote: illustrative route map for SMM Storefront tenant Admin.
Launch checklist (print this)
- Platform (+ optional new service type)
- Service row with slug
- Supplier import or manual link on edit
- Batch-create packages (or manual tiers)
- Page SEO + Content + FAQ (+ testimonials when ready)
- Homepage shows platform tile
- Service URL shows package cards
- Test order →
/admin/orders
Your next step
Run the checklist on your tenant. TheFameNest is a public reference store; your panel keys and margins stay in Admin only.
Need the business case first? Read launch an SMM services site in minutes or start at smmstorefront.com.
About the author

Marcus Reed
Head of Storefront Operations
Former SMM panel operator. Writes about launch timelines, payment routing, and what resellers need before day one.