
How to connect your own domain to your SMM panel, without touching DNS records
November 13, 2026

Marcus Reed
Head of Storefront Operations
You bought a domain; now it has to become your panel. Change two nameservers at your registrar and the rest (records, checks, HTTPS) is done for you. Video and step-by-step screenshots.
Prefer to watch? The video covers everything below in under two minutes.
The problem
A new domain does nothing on its own. To put a site on it you are usually told to add an A record, or a CNAME, or both, then get an SSL certificate, then wait, with no way to tell which of those steps went wrong when the site does not load. If the domain already carries your email, one wrong record takes the mailbox down too.
What you do, and what is done for you
| You | Done for you |
|---|---|
| Type your domain | We look up where its DNS is managed and offer the ways that fit |
| Change two nameservers at your registrar | Your current records are copied first, email included |
| Wait | The page checks on its own and connects the domain |
| Pick a design and name the site | Pages and settings are set up, and HTTPS is issued |
Step by step
1. Enter your domain
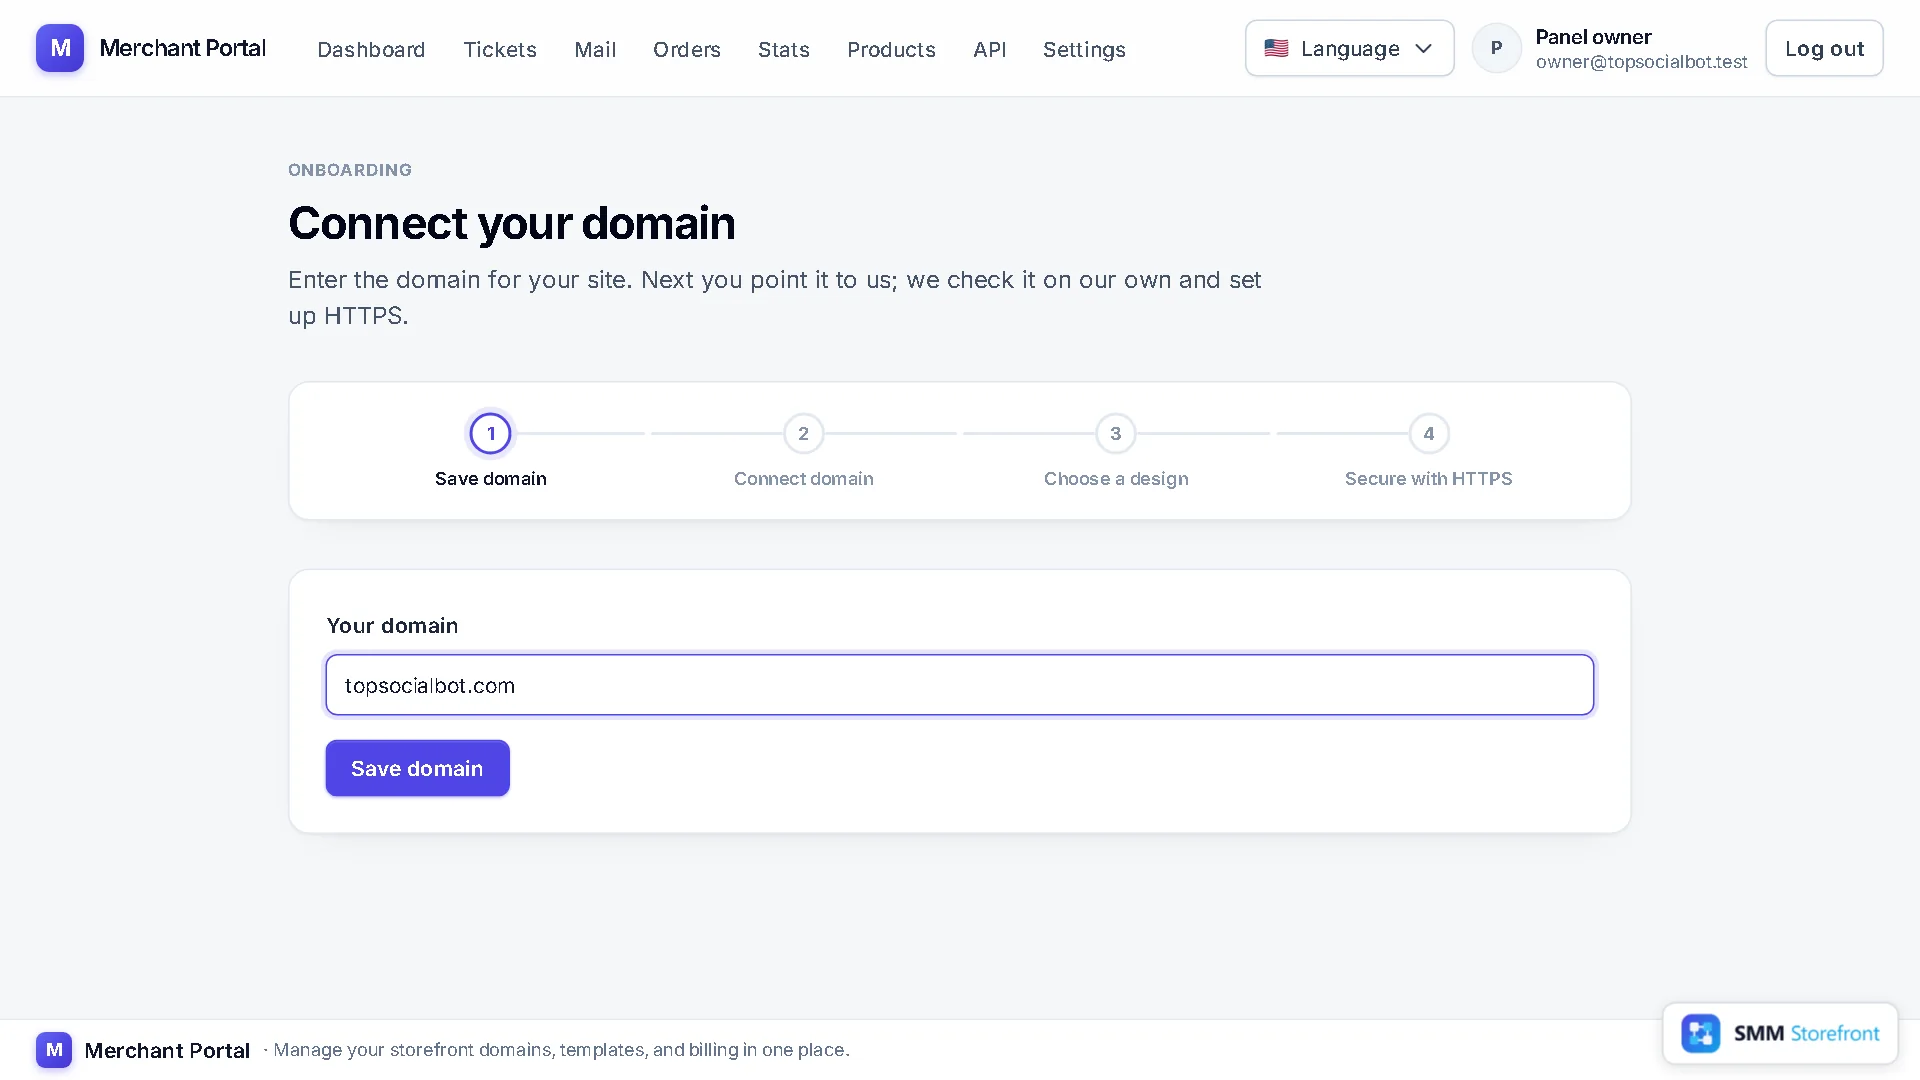
After you sign up, the first page you see is Connect your domain. Type the domain without https:// and click Save domain. To add another site later, use Add site on your dashboard and choose SMM panel.
2. Choose "Let us manage your DNS"
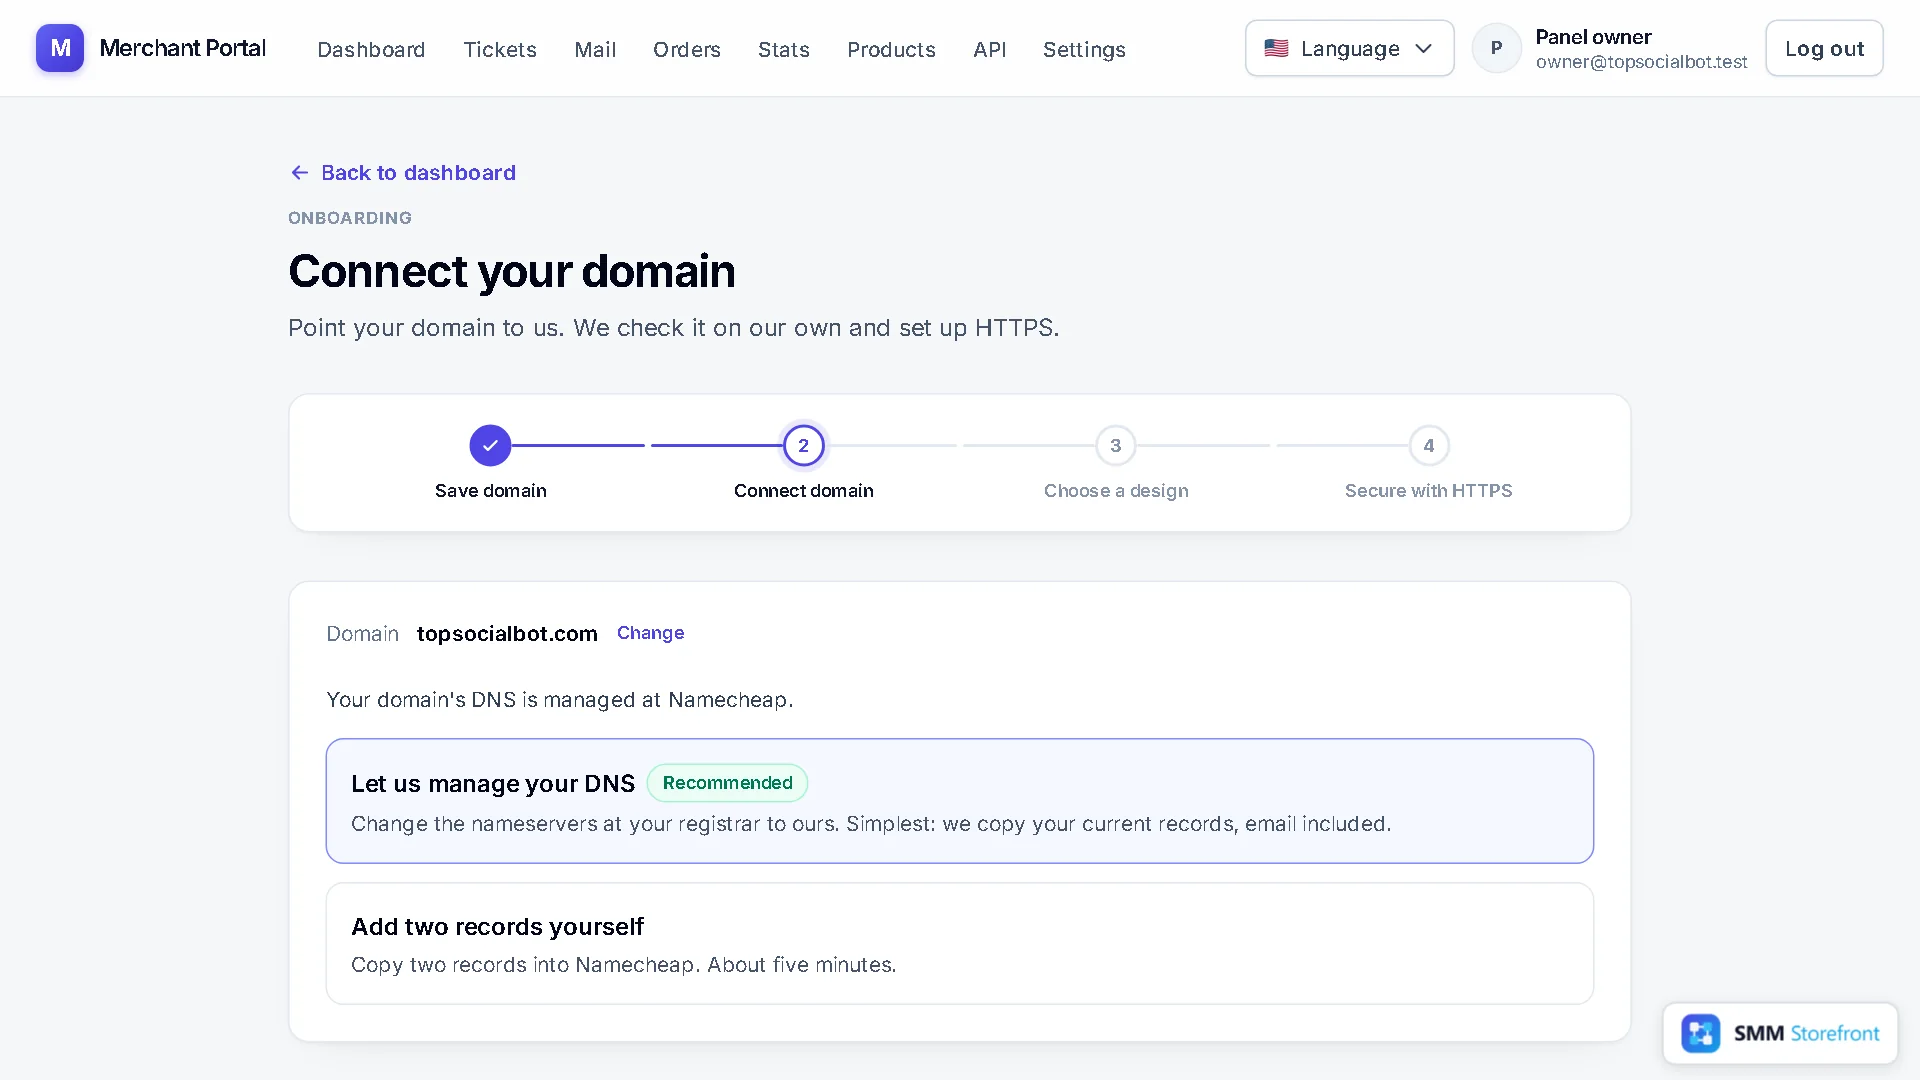
The page names the company that manages your domain's DNS today and lists the ways to connect, simplest first. Let us manage your DNS is the recommended one: you change the nameservers once and never edit a record.
3. Copy the two nameservers
You get two nameservers, and under them the nameservers your domain uses now. Click each one to copy it. Yours will differ from the ones in this example: always copy them from your own page.
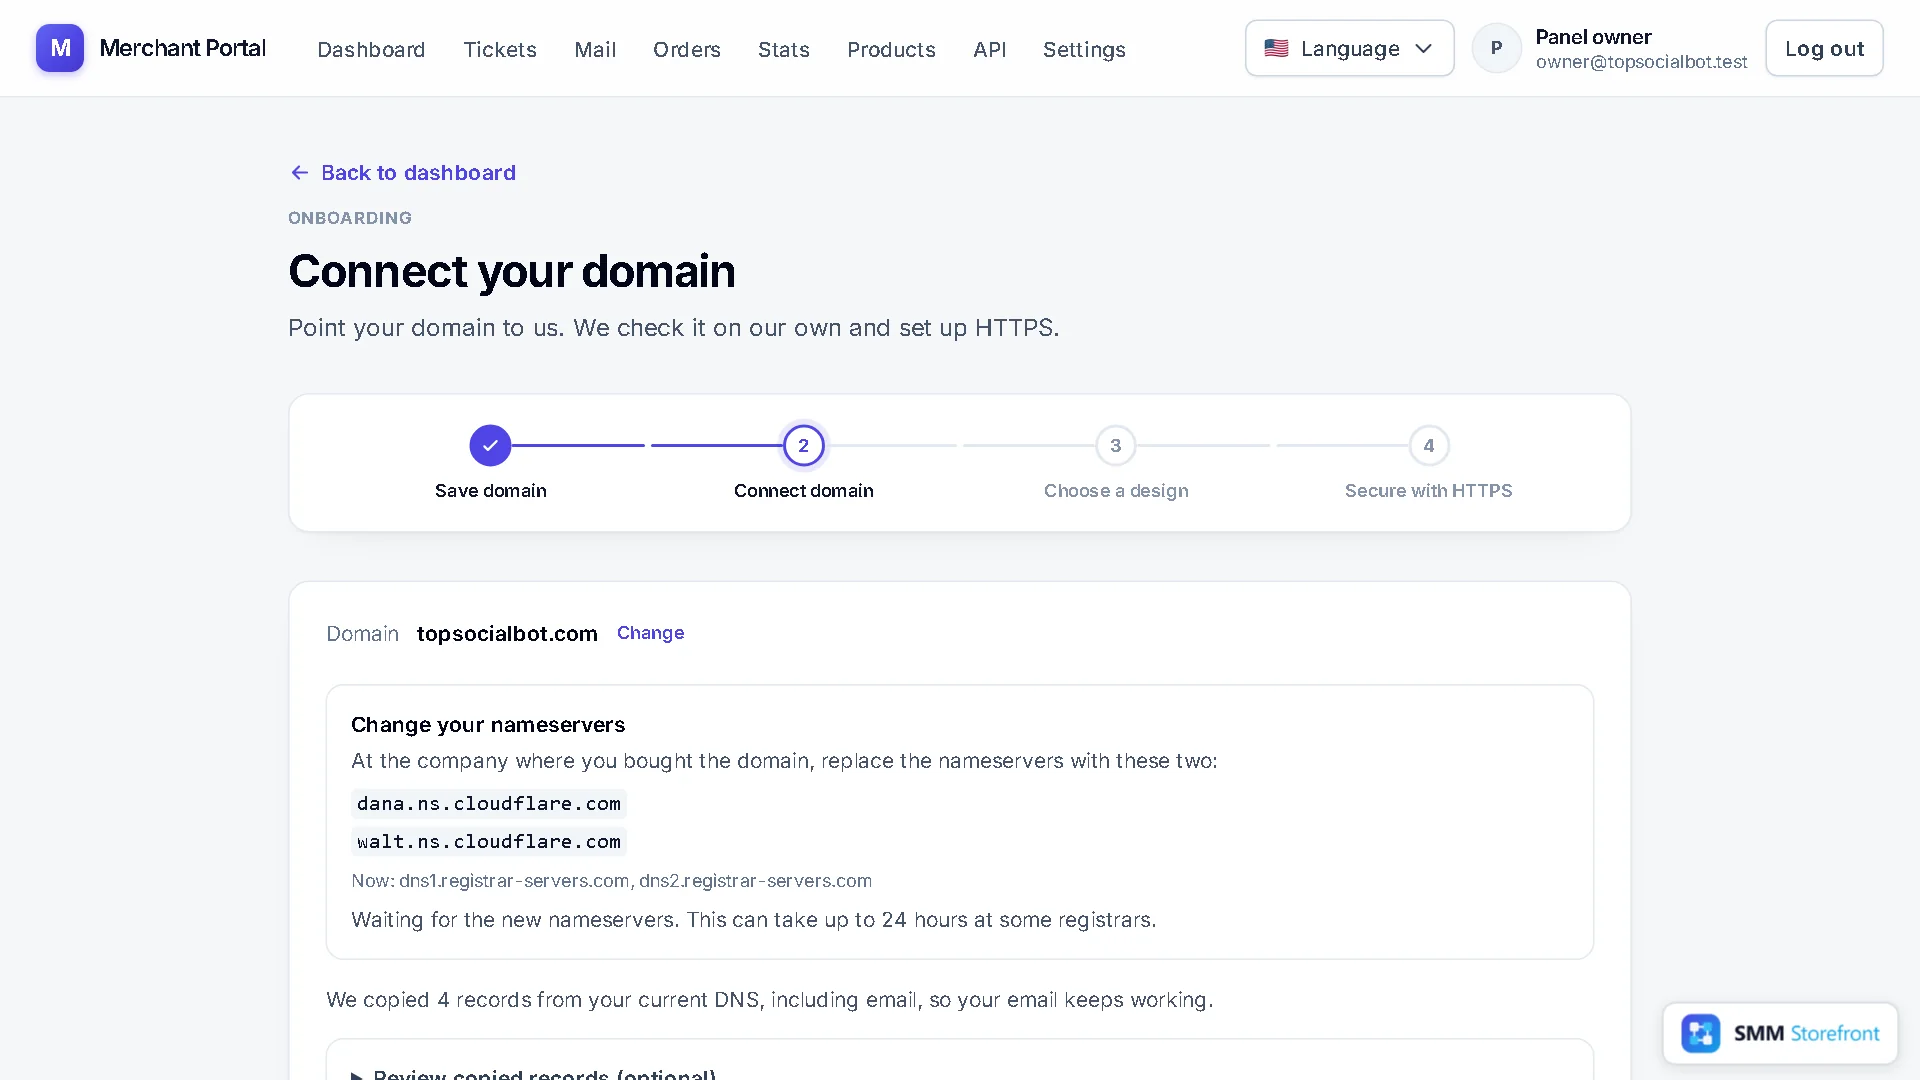
Before you switch, the records your domain already has are copied, so nothing that works today stops working. Open Review copied records to see them. Email records carry an Email label; if you use email on the domain and see no MX records listed, add them here before you change the nameservers.
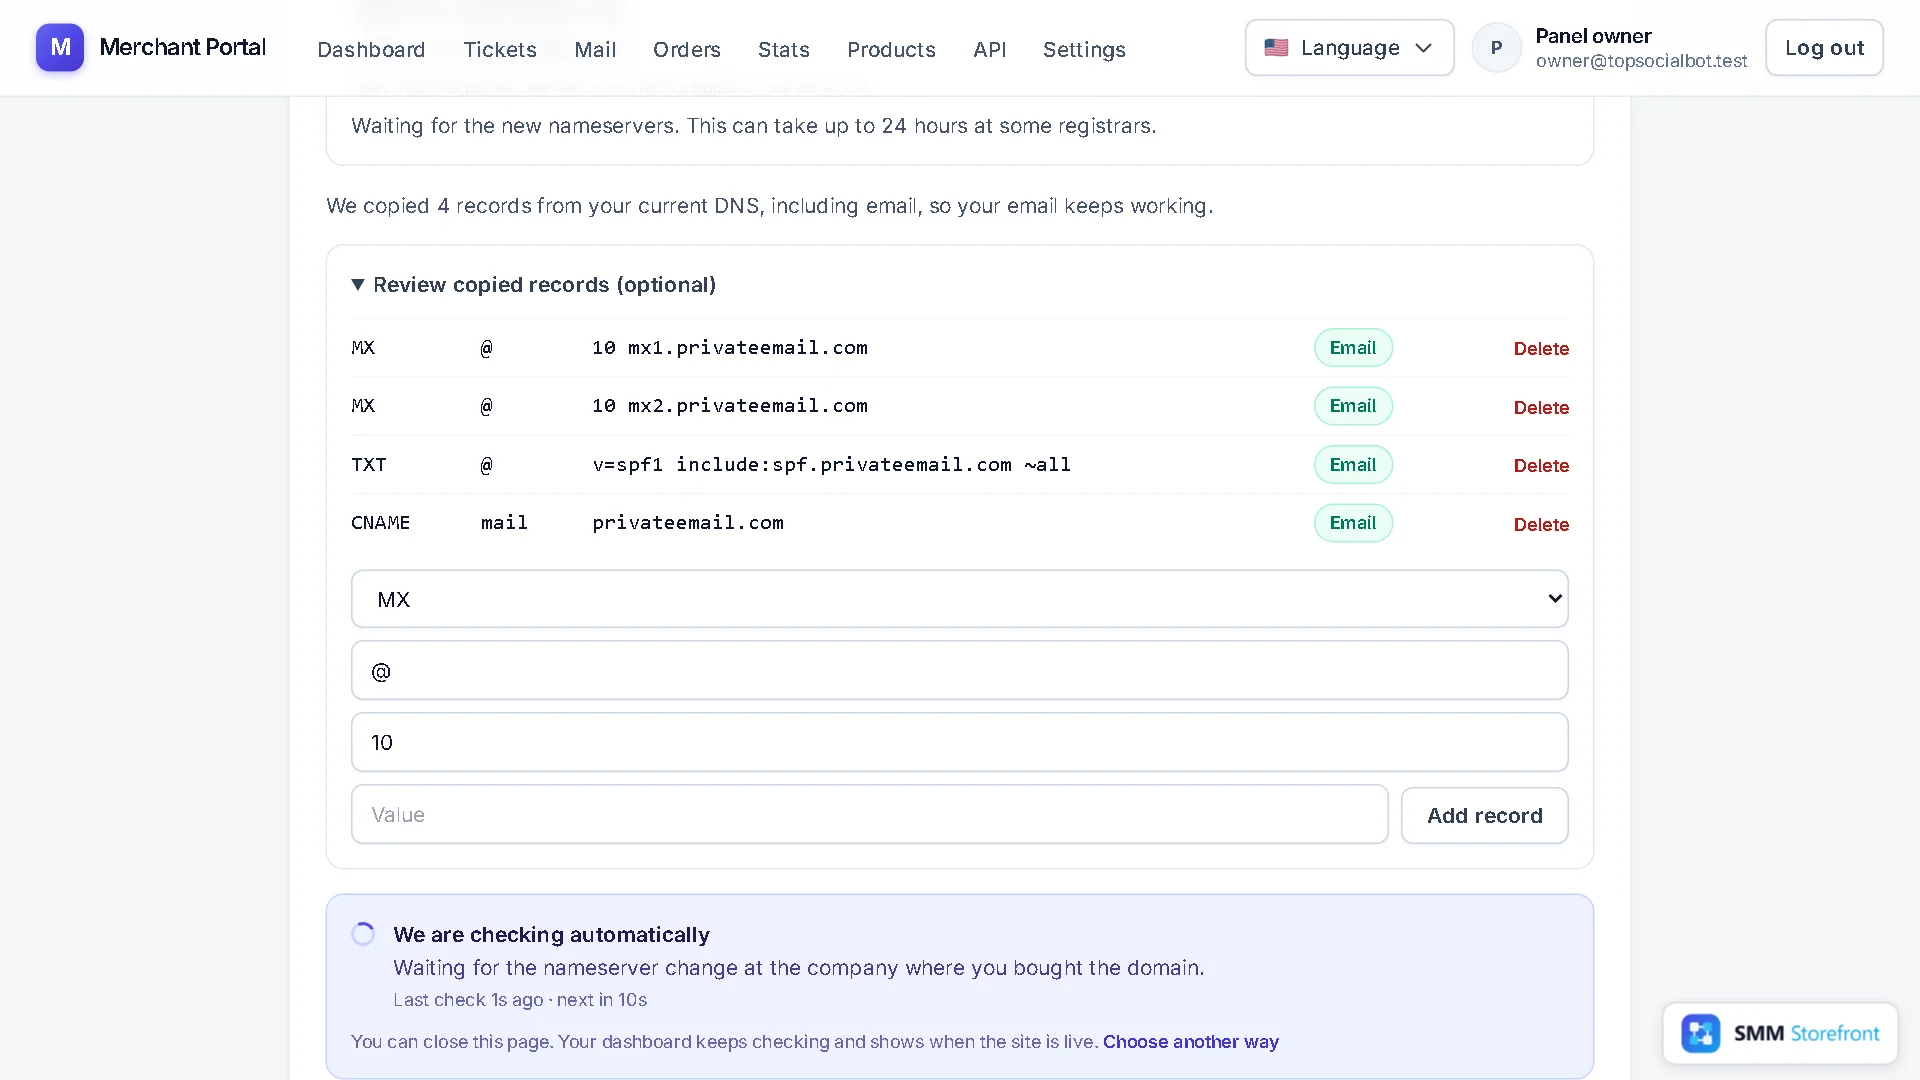
4. Paste them at your registrar
Sign in at the company where you bought the domain. Open the domain's settings, find Nameservers (sometimes under DNS), choose custom nameservers, replace what is there with the two you copied, and save.
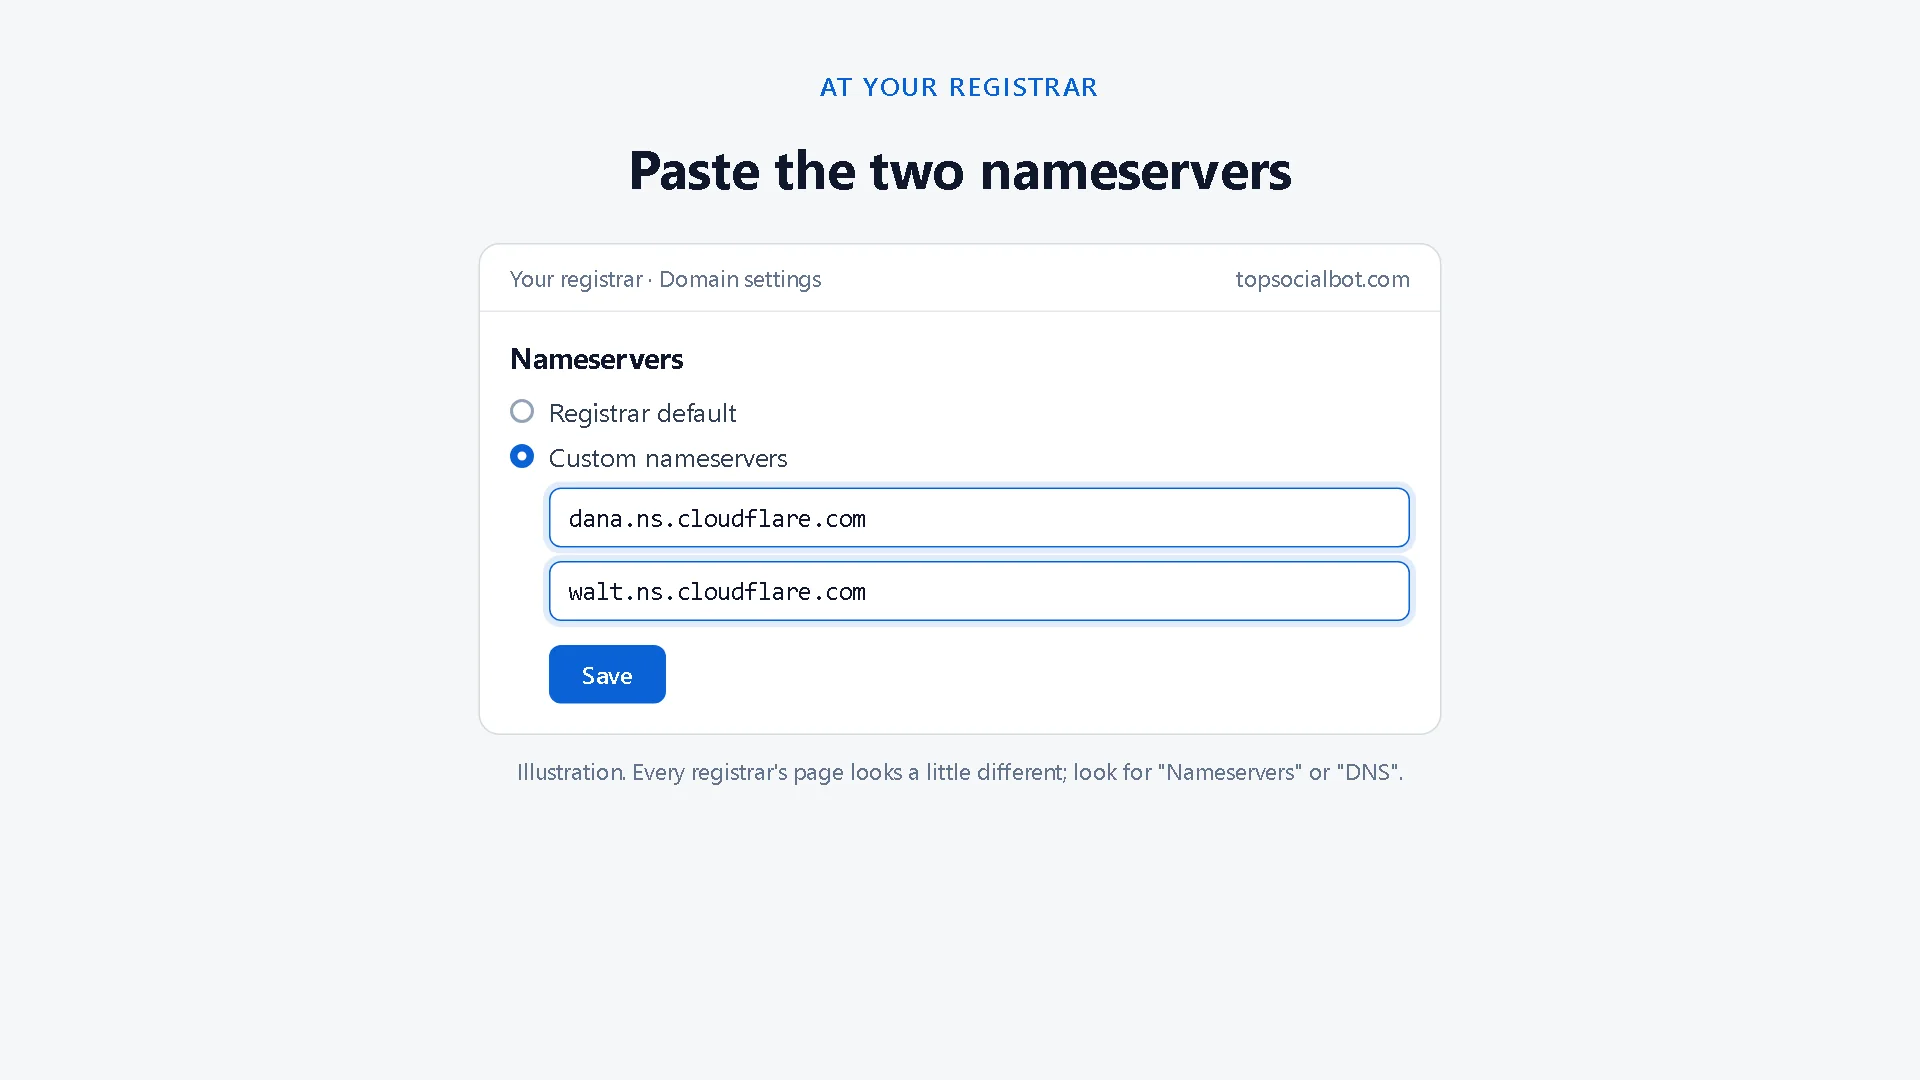
5. Wait; there is nothing to press
Back on the connect page, a box says We are checking automatically, with the time of the last check. You can close the page: your dashboard keeps checking. Most registrars apply a nameserver change within minutes; some take up to 24 hours.
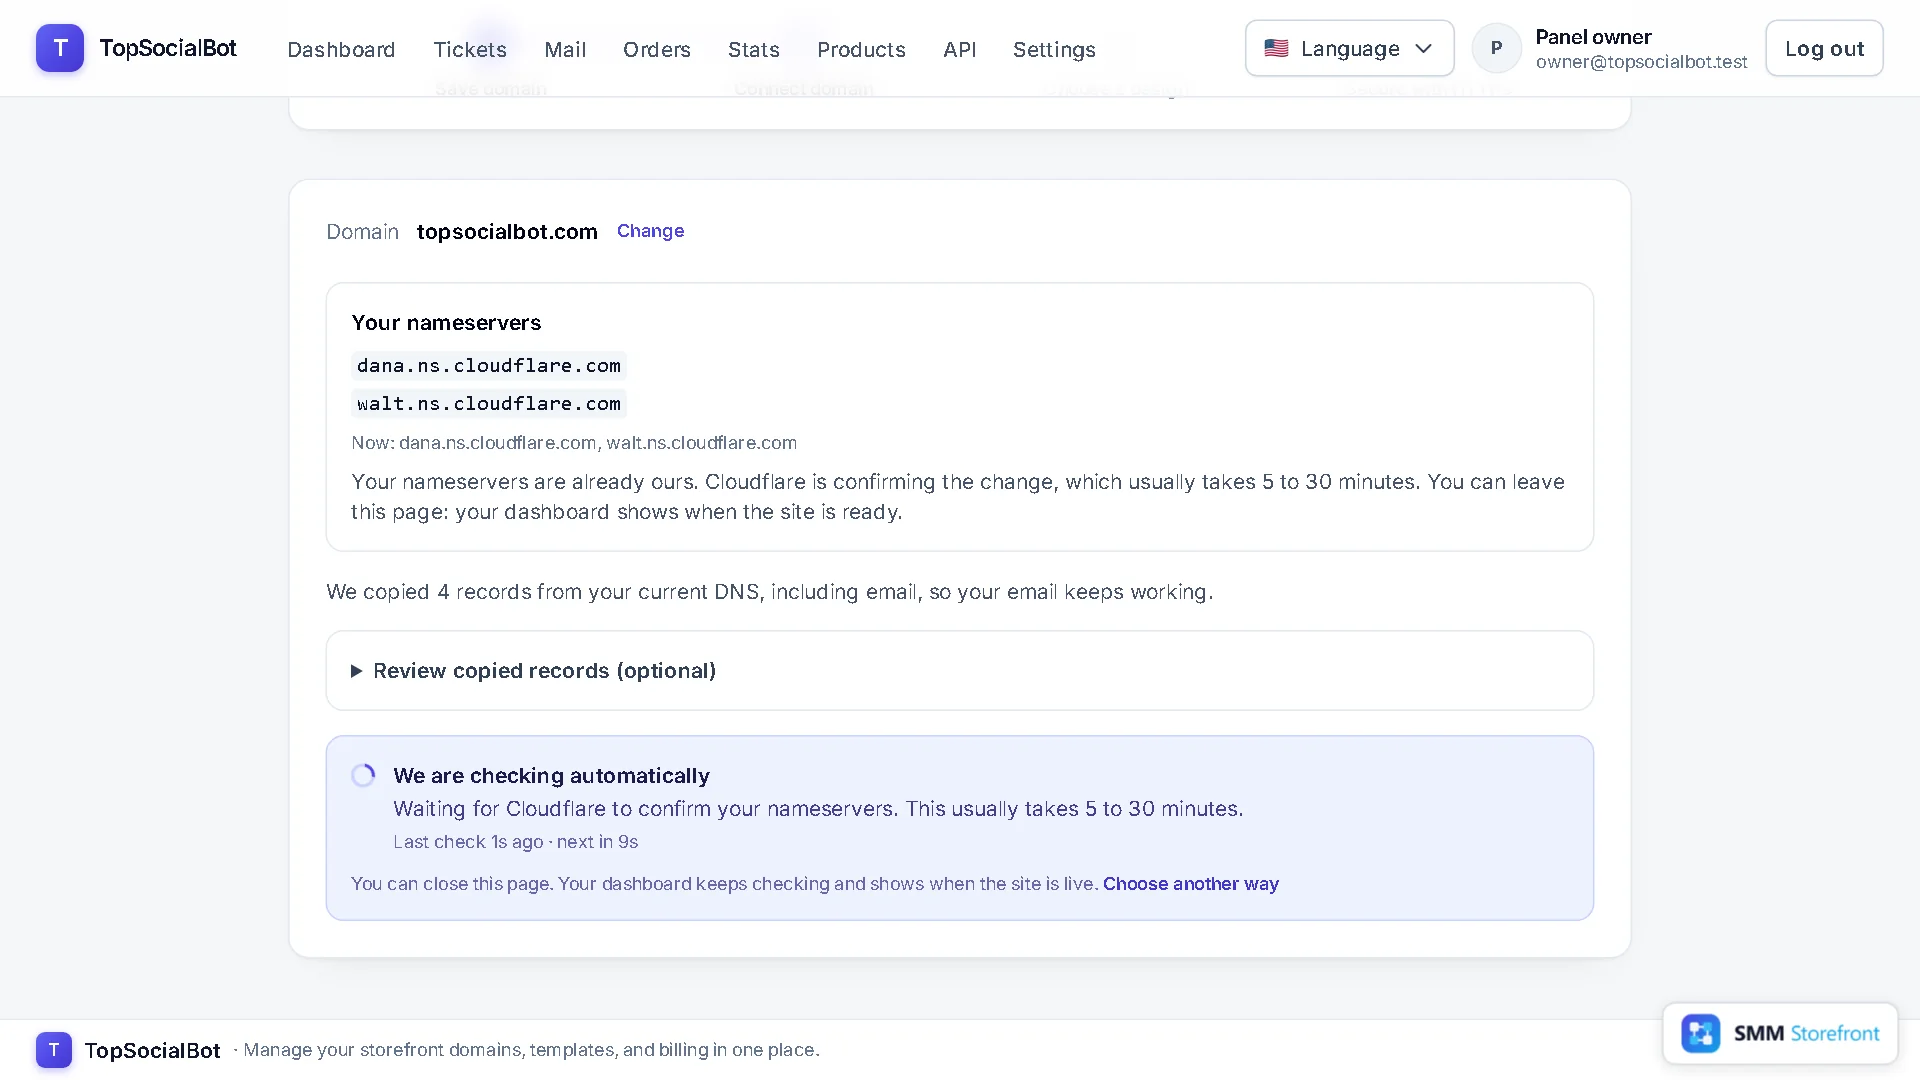
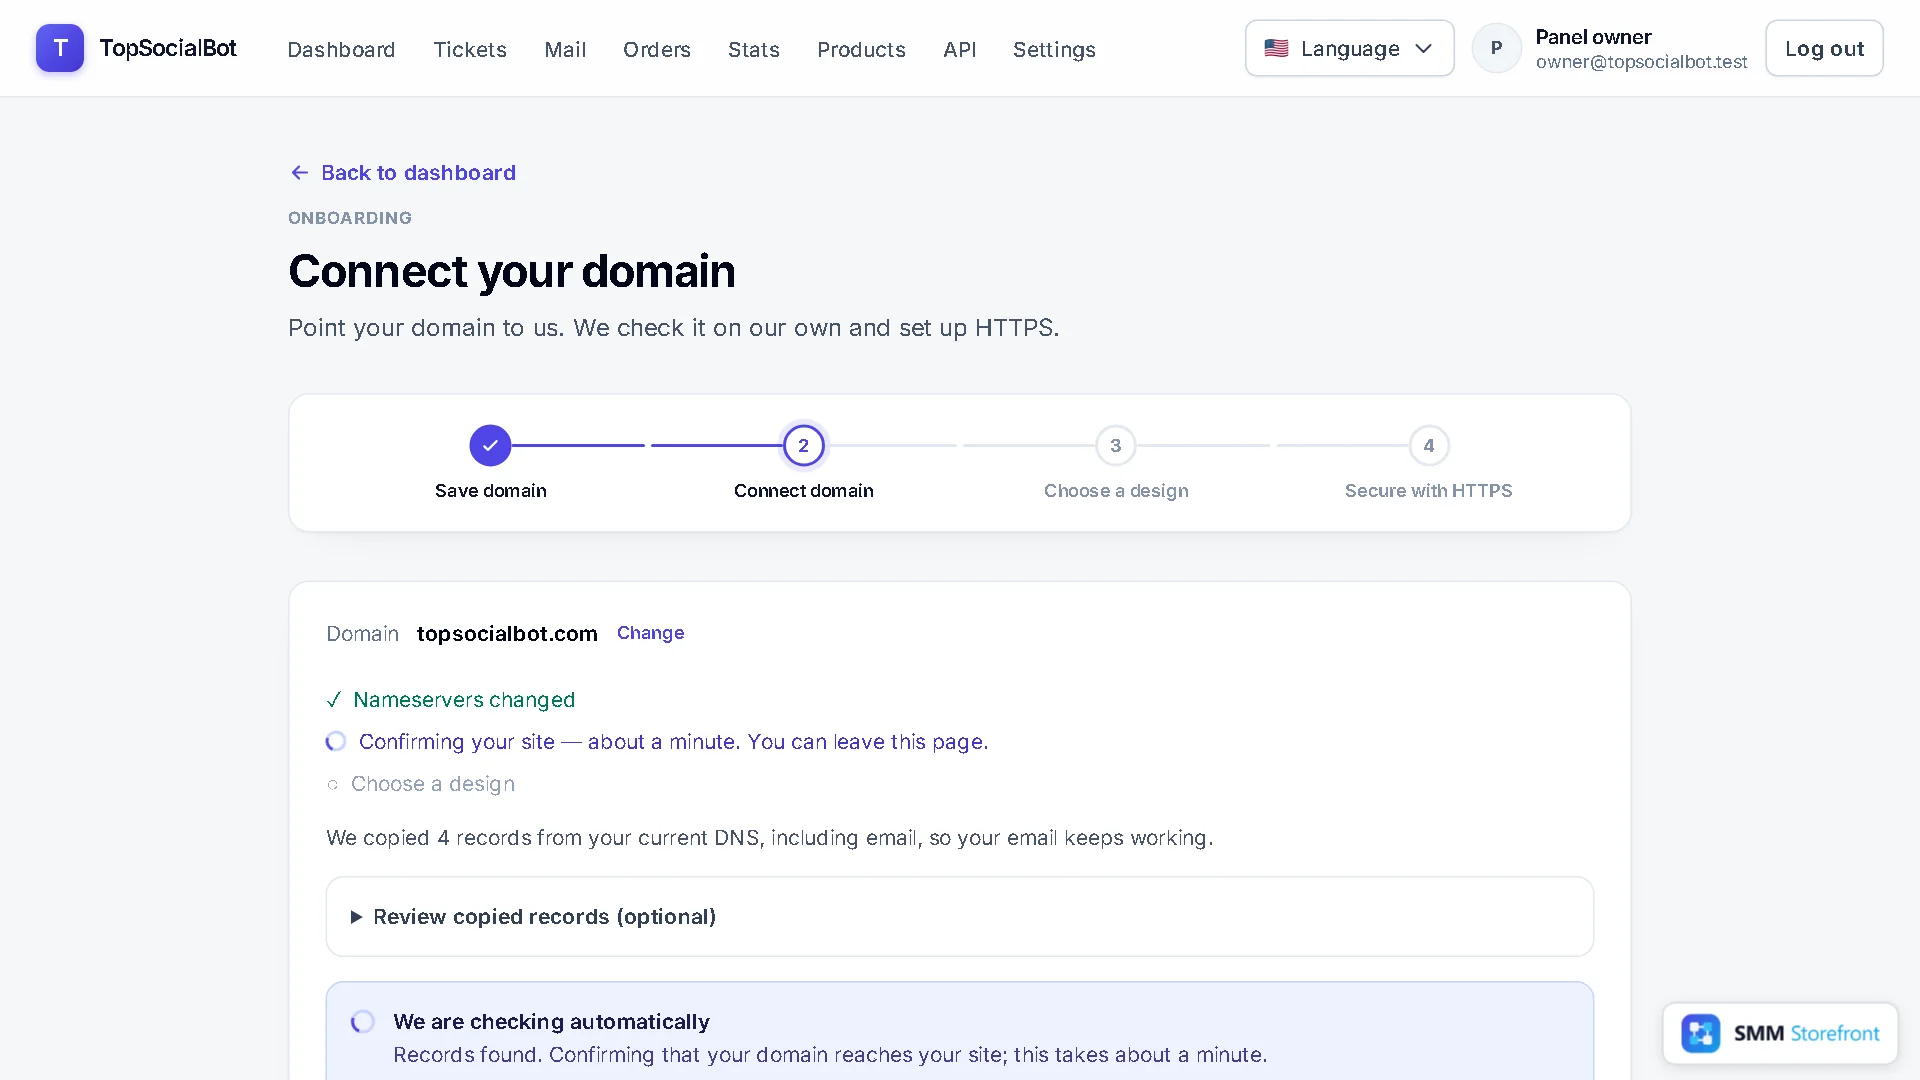
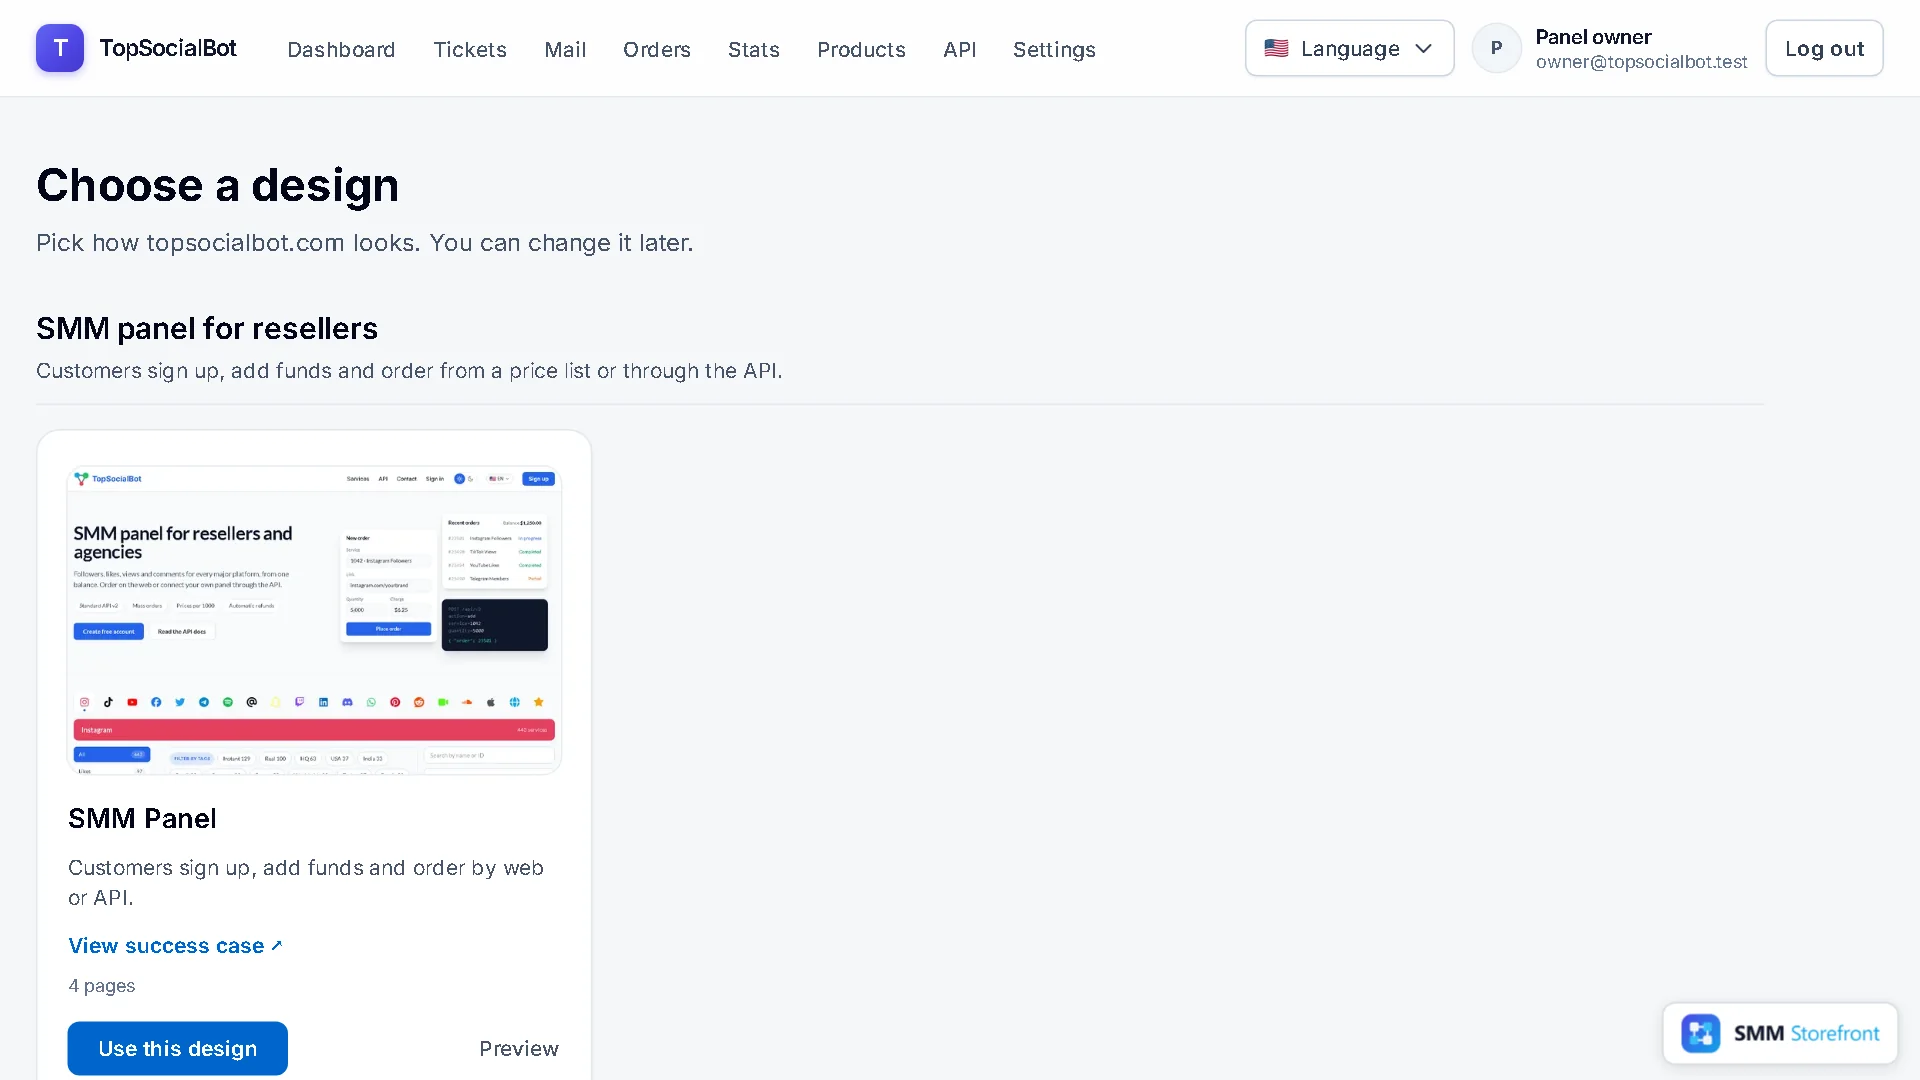
6. Choose a design and name your site
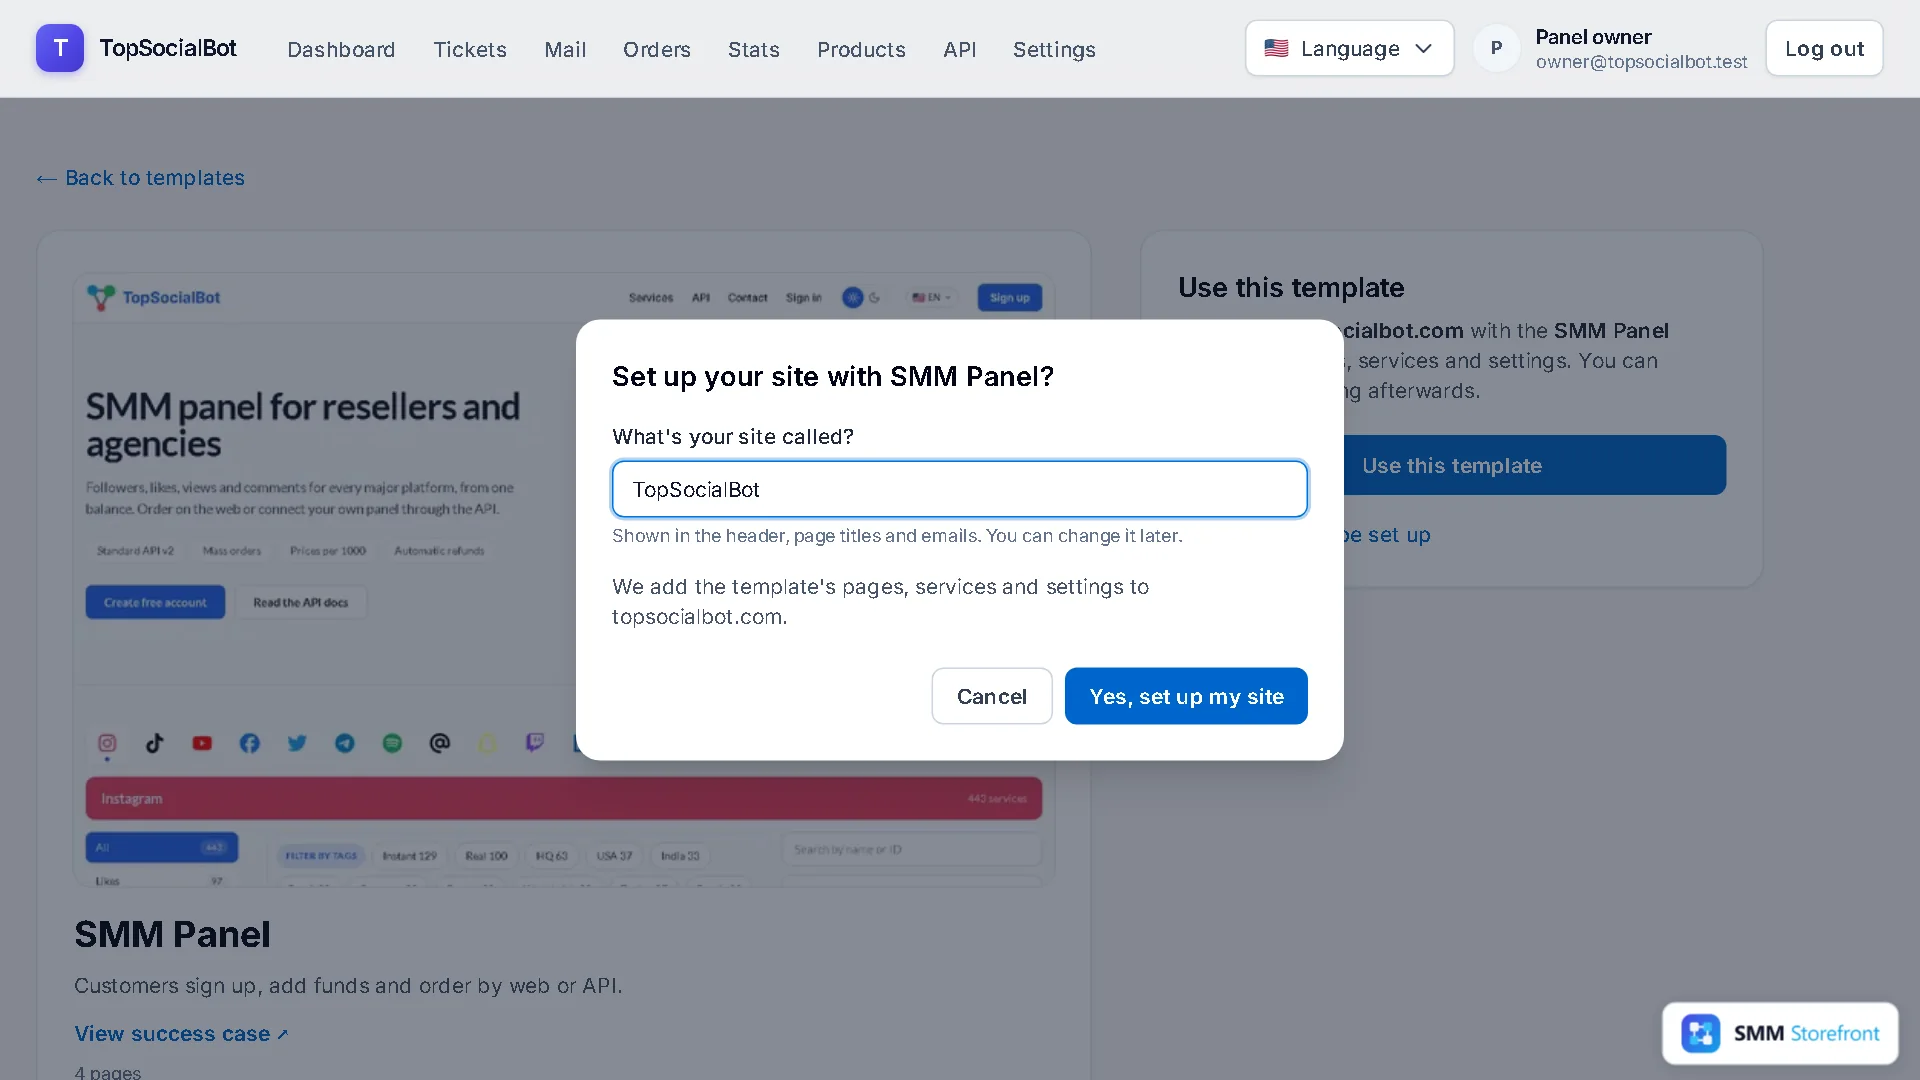
When the domain is connected, the page takes you to Choose a design. For a panel that is SMM Panel. Click Use this design, type what your site is called (it shows in the header, page titles and emails, and you can change it later), and confirm.
7. HTTPS, then live
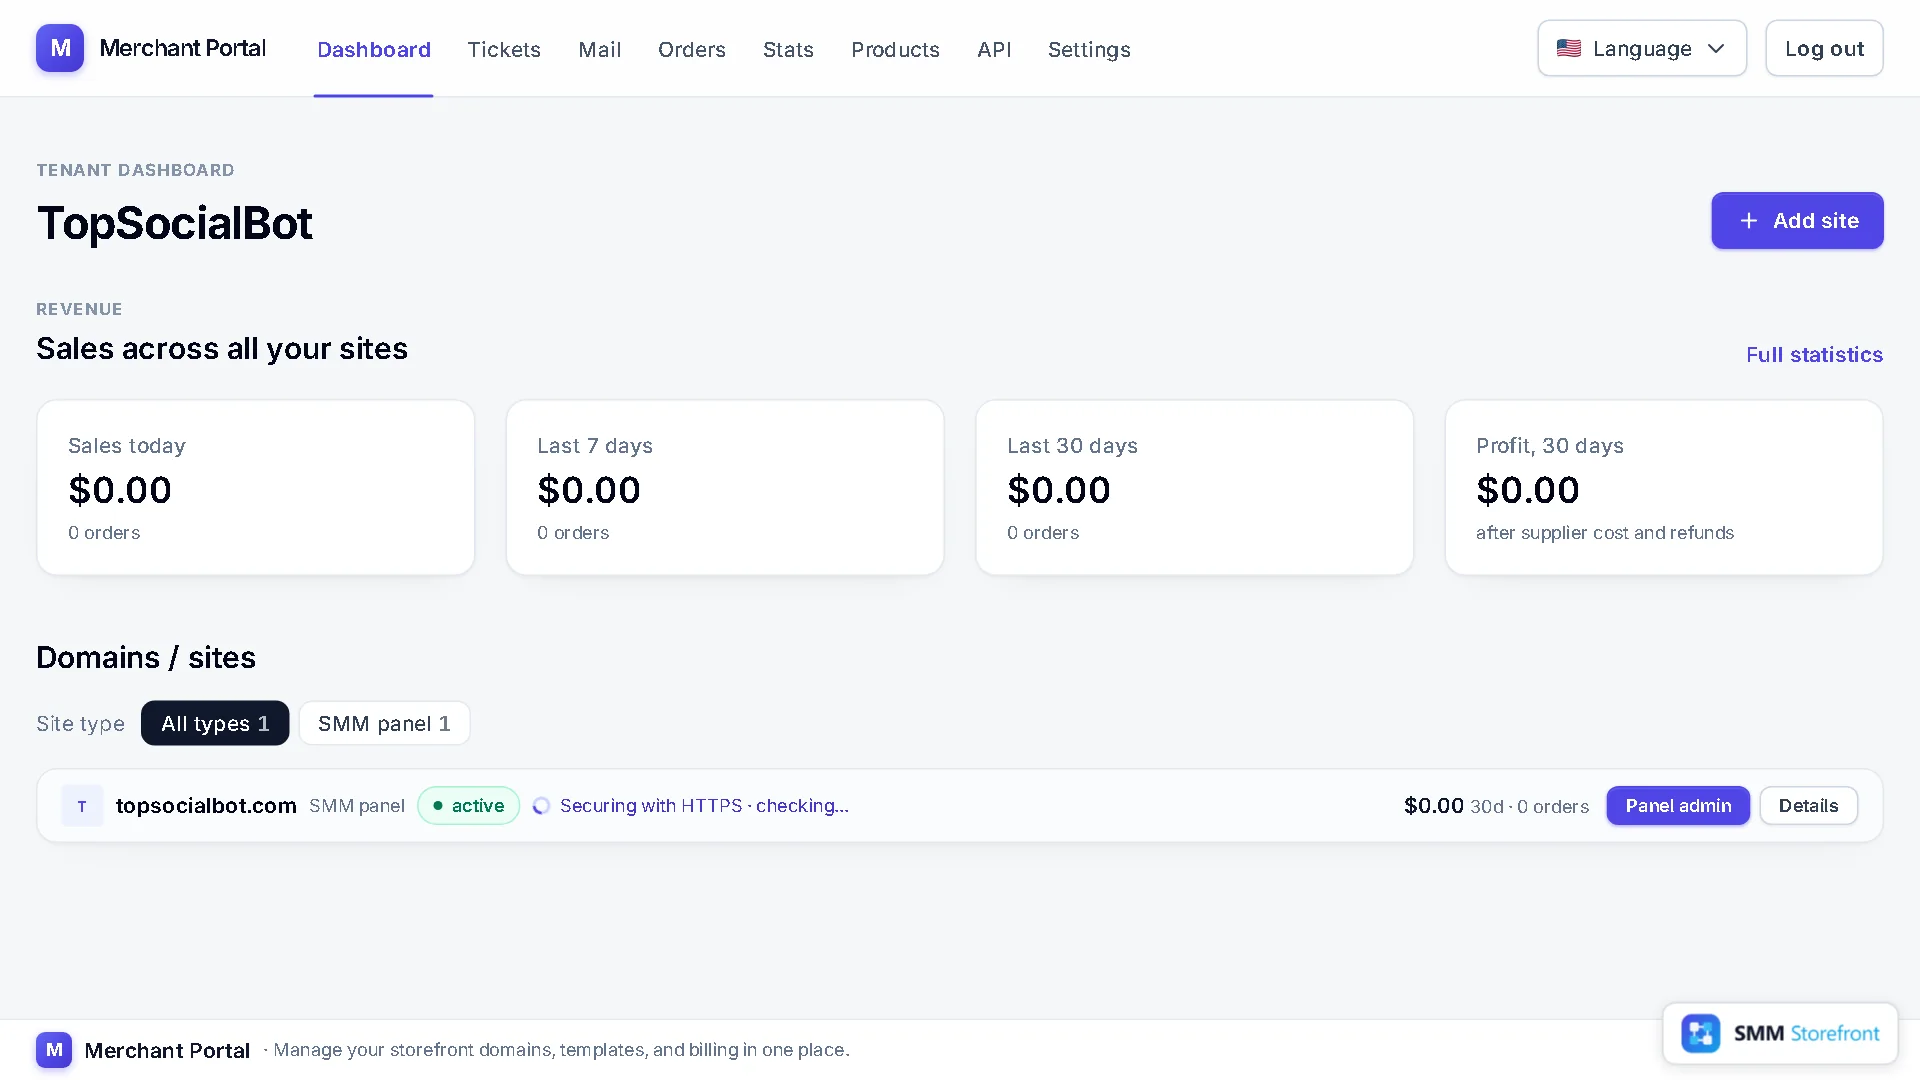
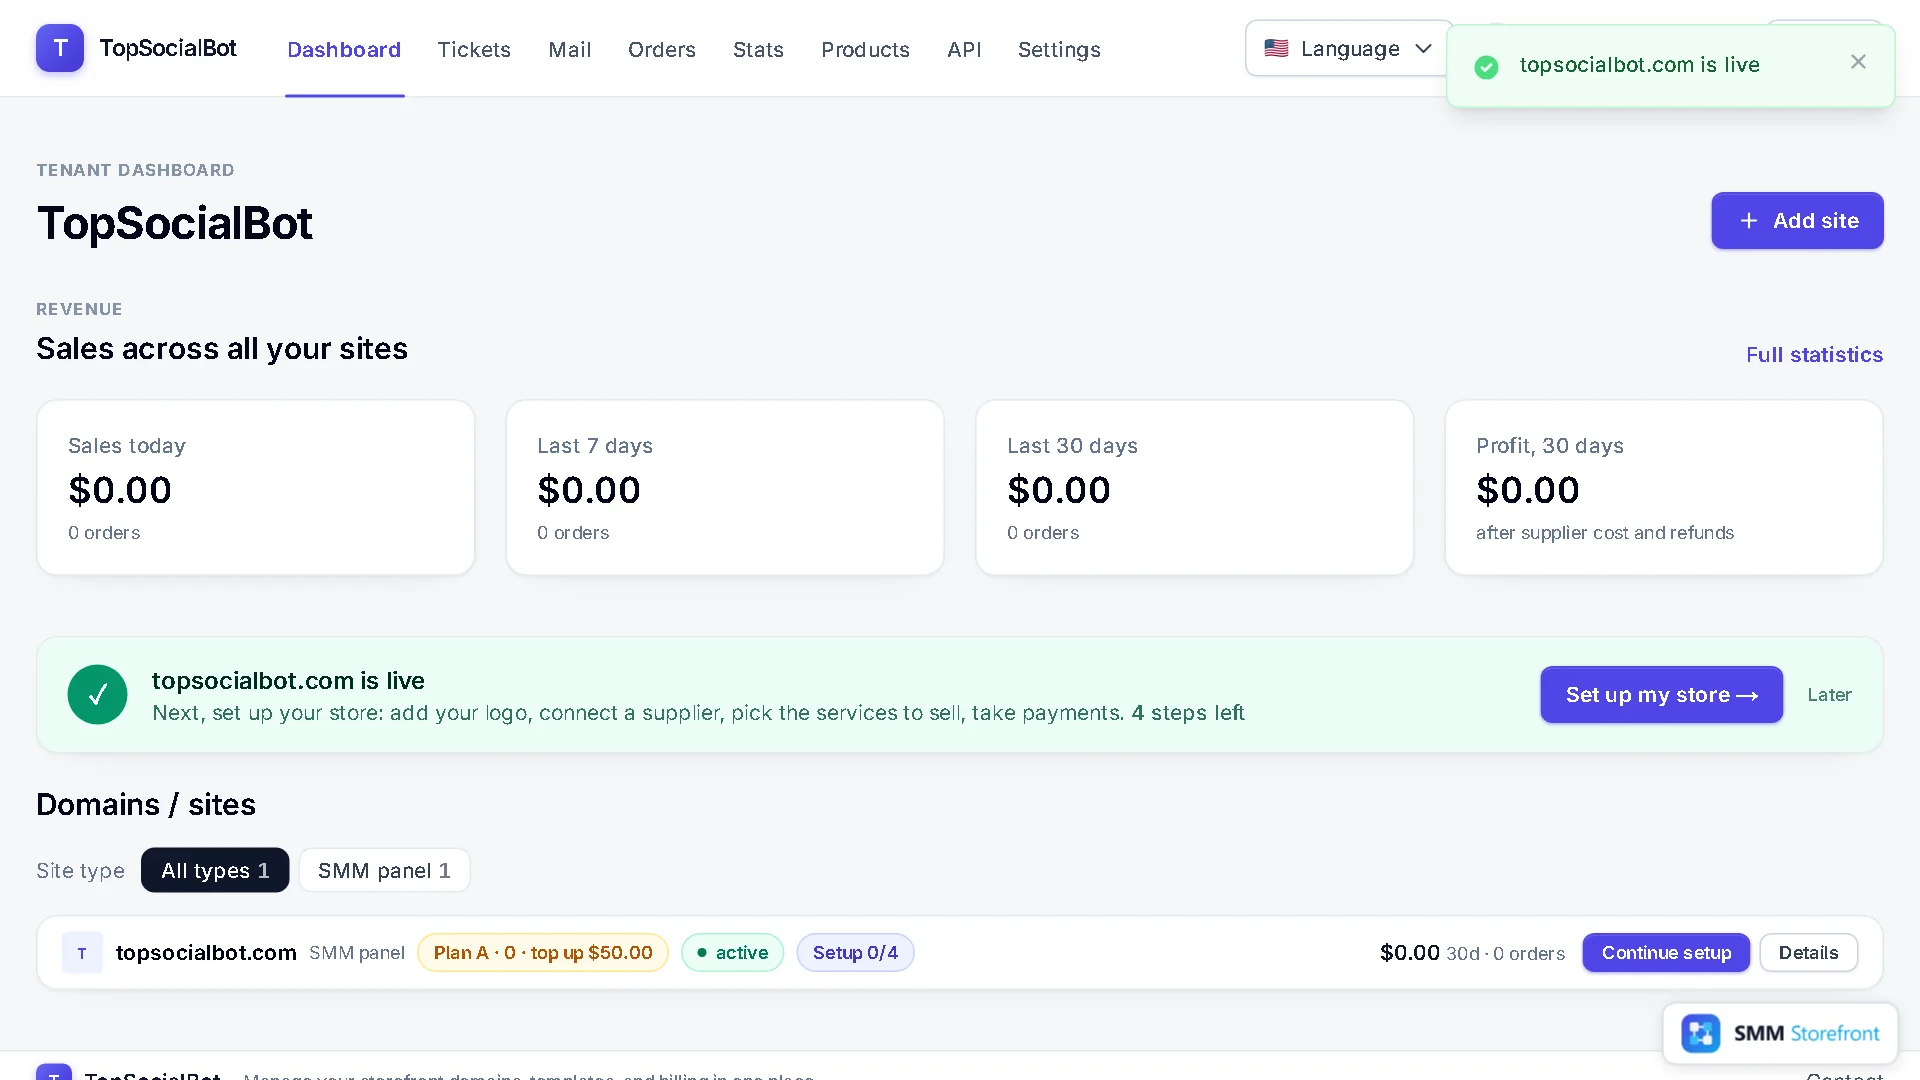
You land on your dashboard. The site's row reads Securing with HTTPS while the certificate is issued, which usually takes a few minutes. There is no certificate to buy, install or renew. When it is done, a card says your domain is live and lists what is left: logo, supplier, services, payments.
If you would rather keep your DNS where it is
Choose Add two records yourself instead. The page shows the exact records for your DNS provider, each with a status that turns to Found when it is right, and it lists old records that would still send visitors to your previous host. Use this way for a subdomain such as panel.example.com too: a subdomain cannot move its nameservers.
Questions
Will my email stop working?
Not if its records are in the copied list. They are copied before you switch; check the list in step 3, and add any MX record that is missing.
How long does it take?
Your part takes about five minutes. The nameserver change is up to your registrar: usually minutes, sometimes hours, at most about a day. HTTPS follows a few minutes after the domain connects.
Can I use www?
The site lives on the bare domain. www is set up as well and sends visitors to it.
I typed the wrong domain.
Until the domain is connected, click Change next to it on the connect page. Once it is connected it is locked; contact support to move the site to another domain.
The full list of what the panel does is on the SMM panel page.
What to do next
- How to set up your SMM panel: connect a supplier, add a service, check its rule, read your ordersConnect a supplier, put your first service on sale and see where its orders go.
- How to add backup providers to a service, so one provider going down does not stop your ordersOne supplier is a single point of failure. Give each service a backup that takes over by itself.
- How to make sure a supplier price rise never makes you sell at a lossMake sure a supplier price rise shows up as a warning and never as a loss.
About the author

Marcus Reed
Head of Storefront Operations
Former SMM panel operator. Writes about launch timelines, payment routing, and what resellers need before day one.